Codex Deployment Guide
Covers CLI installation, API access, and development environment configuration.
📋 Prerequisite (Step One) Complete the Node.js installation first and make sure Node.js 18+ is installed correctly. When configuring CC-Switch, remember to open the advanced options. You can start chatting after adding the model.
🎯 Quick Navigation
Codex is a next-generation AI coding assistant built on the GPT-5 architecture, offering developers powerful code generation and optimization capabilities.
Deployment path: Configure the system environment ➜ Install the CLI tool ➜ Integrate the API ➜ Prepare the development environment
🚀 Quick Setup with CC-Switch (Recommended)
⚠️ Prerequisite
Before configuring Codex with CC-Switch, make sure you have installed the Codex tool globally with npm:
npm install -g @openai/codex@latestVerify the installation: codex --version
We recommend the CC-Switch quick configuration tool for simple graphical setup without command-line work.
Configuration Steps
- Launch CC-Switch and switch to the Codex tab
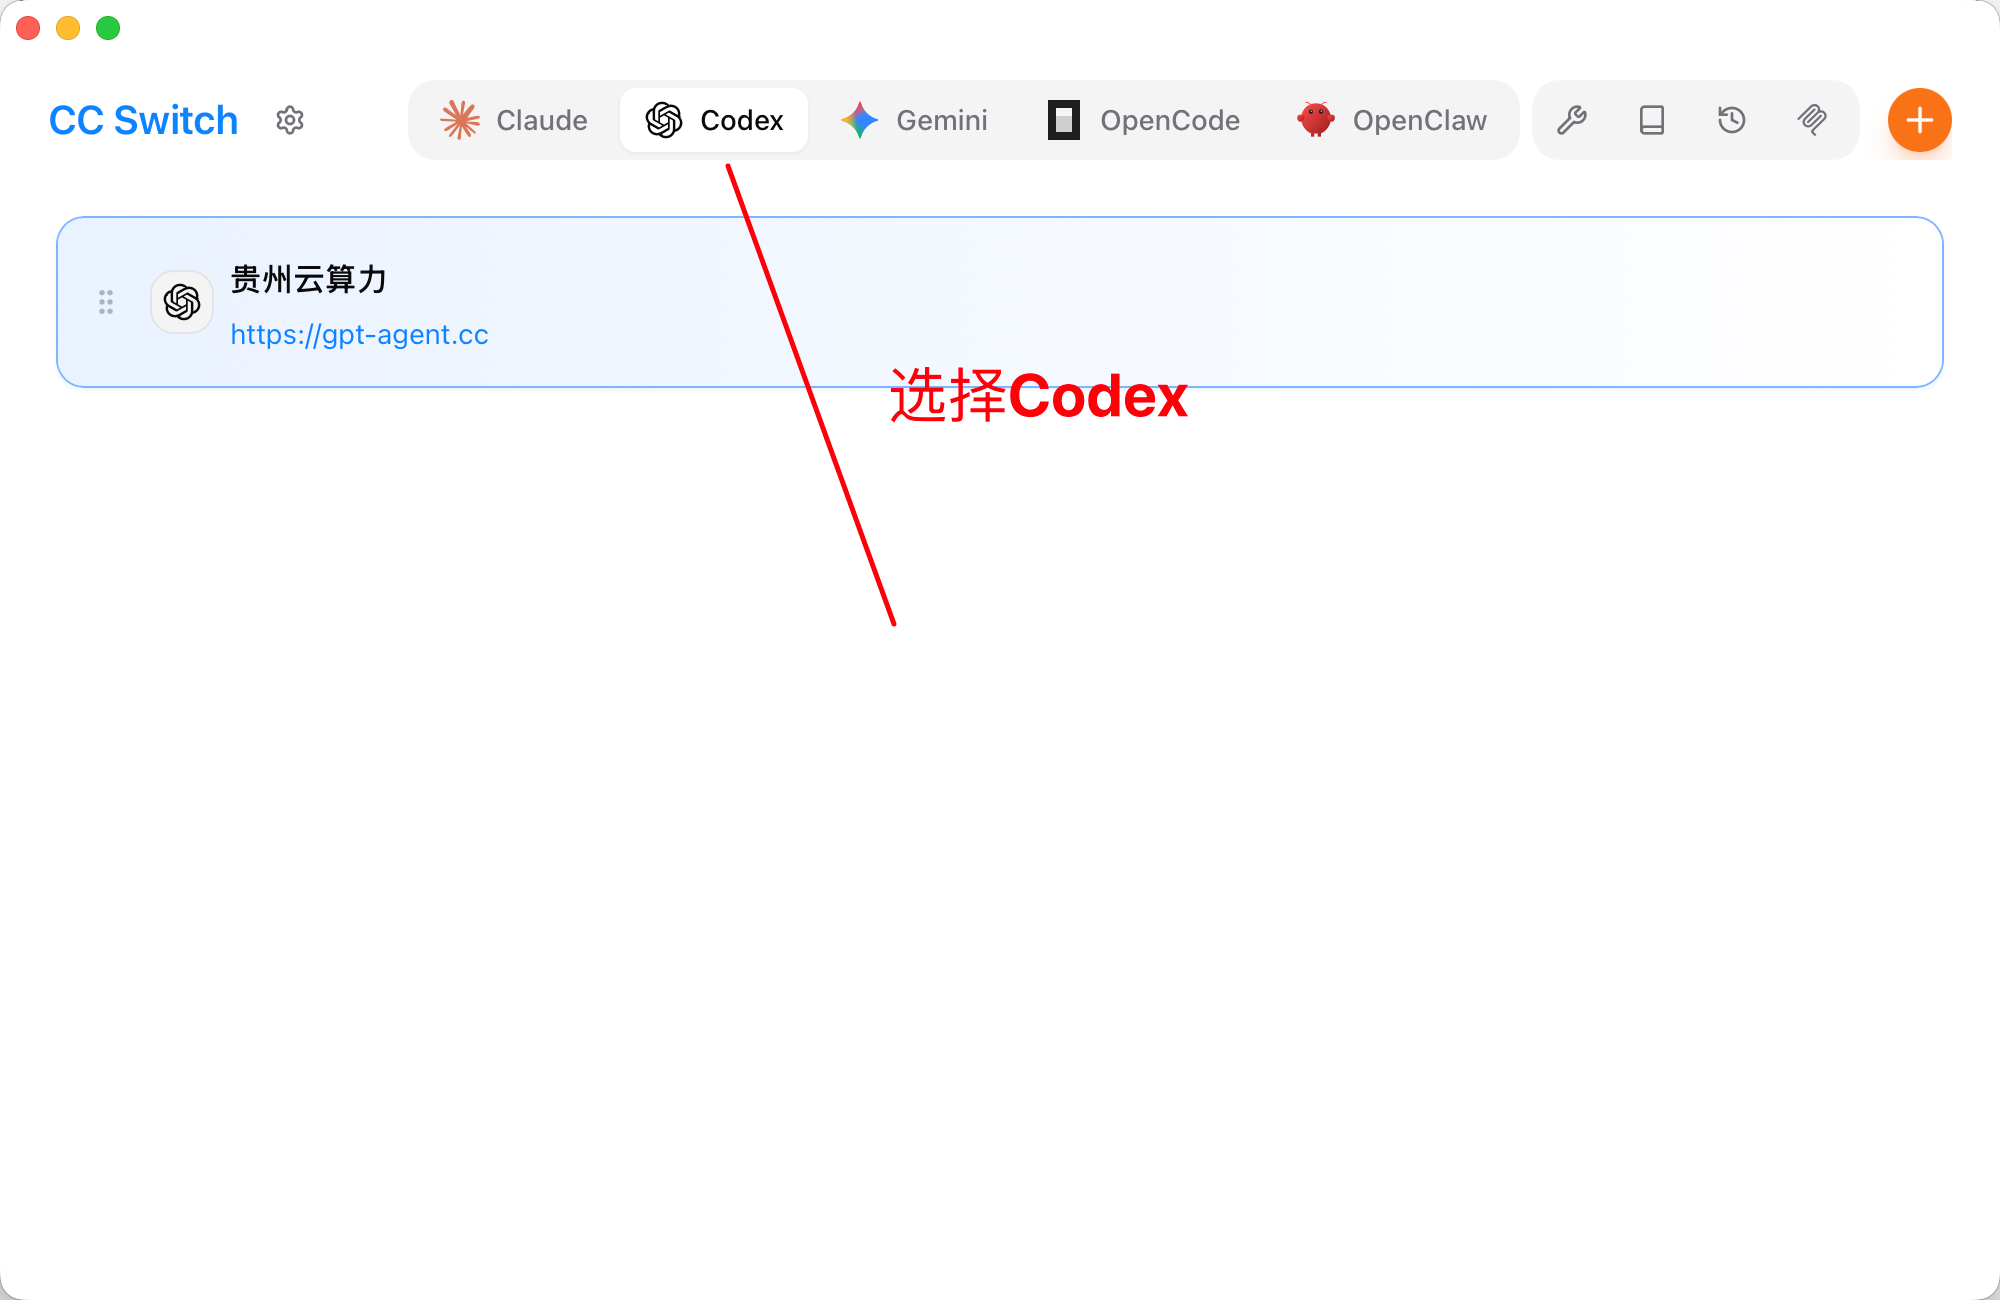 The CC-Switch application with several tabs at the top. A red arrow high…
- Open the CC-Switch application
- Click the “Codex” tab at the top
- Click the orange “+” button in the upper-right corner to add a configuration
- Enter the Codex provider configuration
- Provider name: Enter a custom name, such as “gpt-agent”
- Base URL: Enter https://api.llm-token.cn/v1
- API Key: Paste your API key
- Model: Select
gpt-5.5as an example; confirm availability in the current model list. - Other settings: Adjust reasoning effort, network access, and other parameters as needed
- Click “Save”
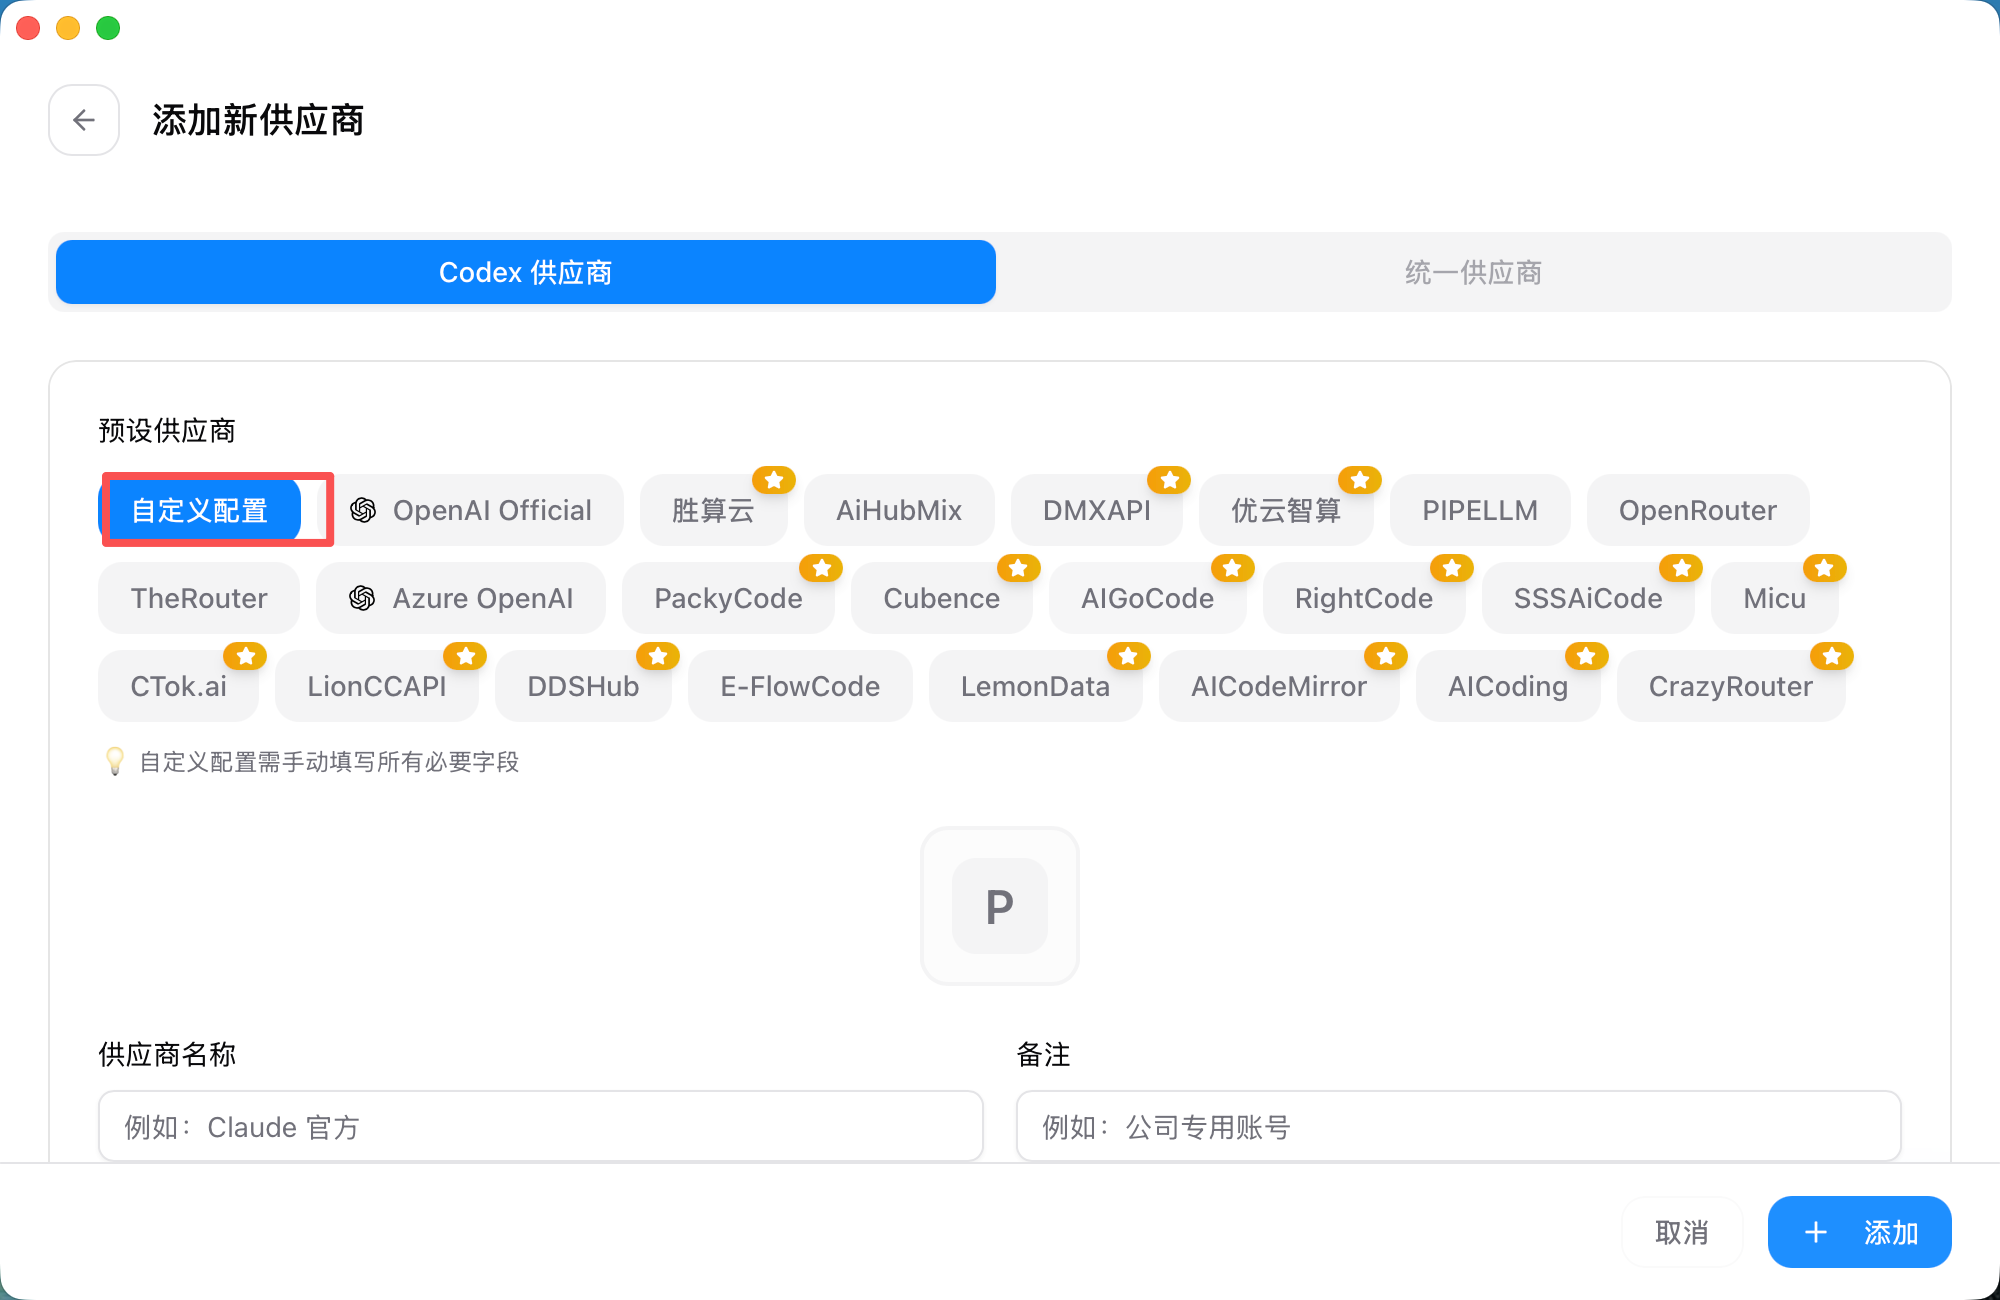 The Add Configuration screen in CC-Switch. Tabs for “Codex Provider” and…
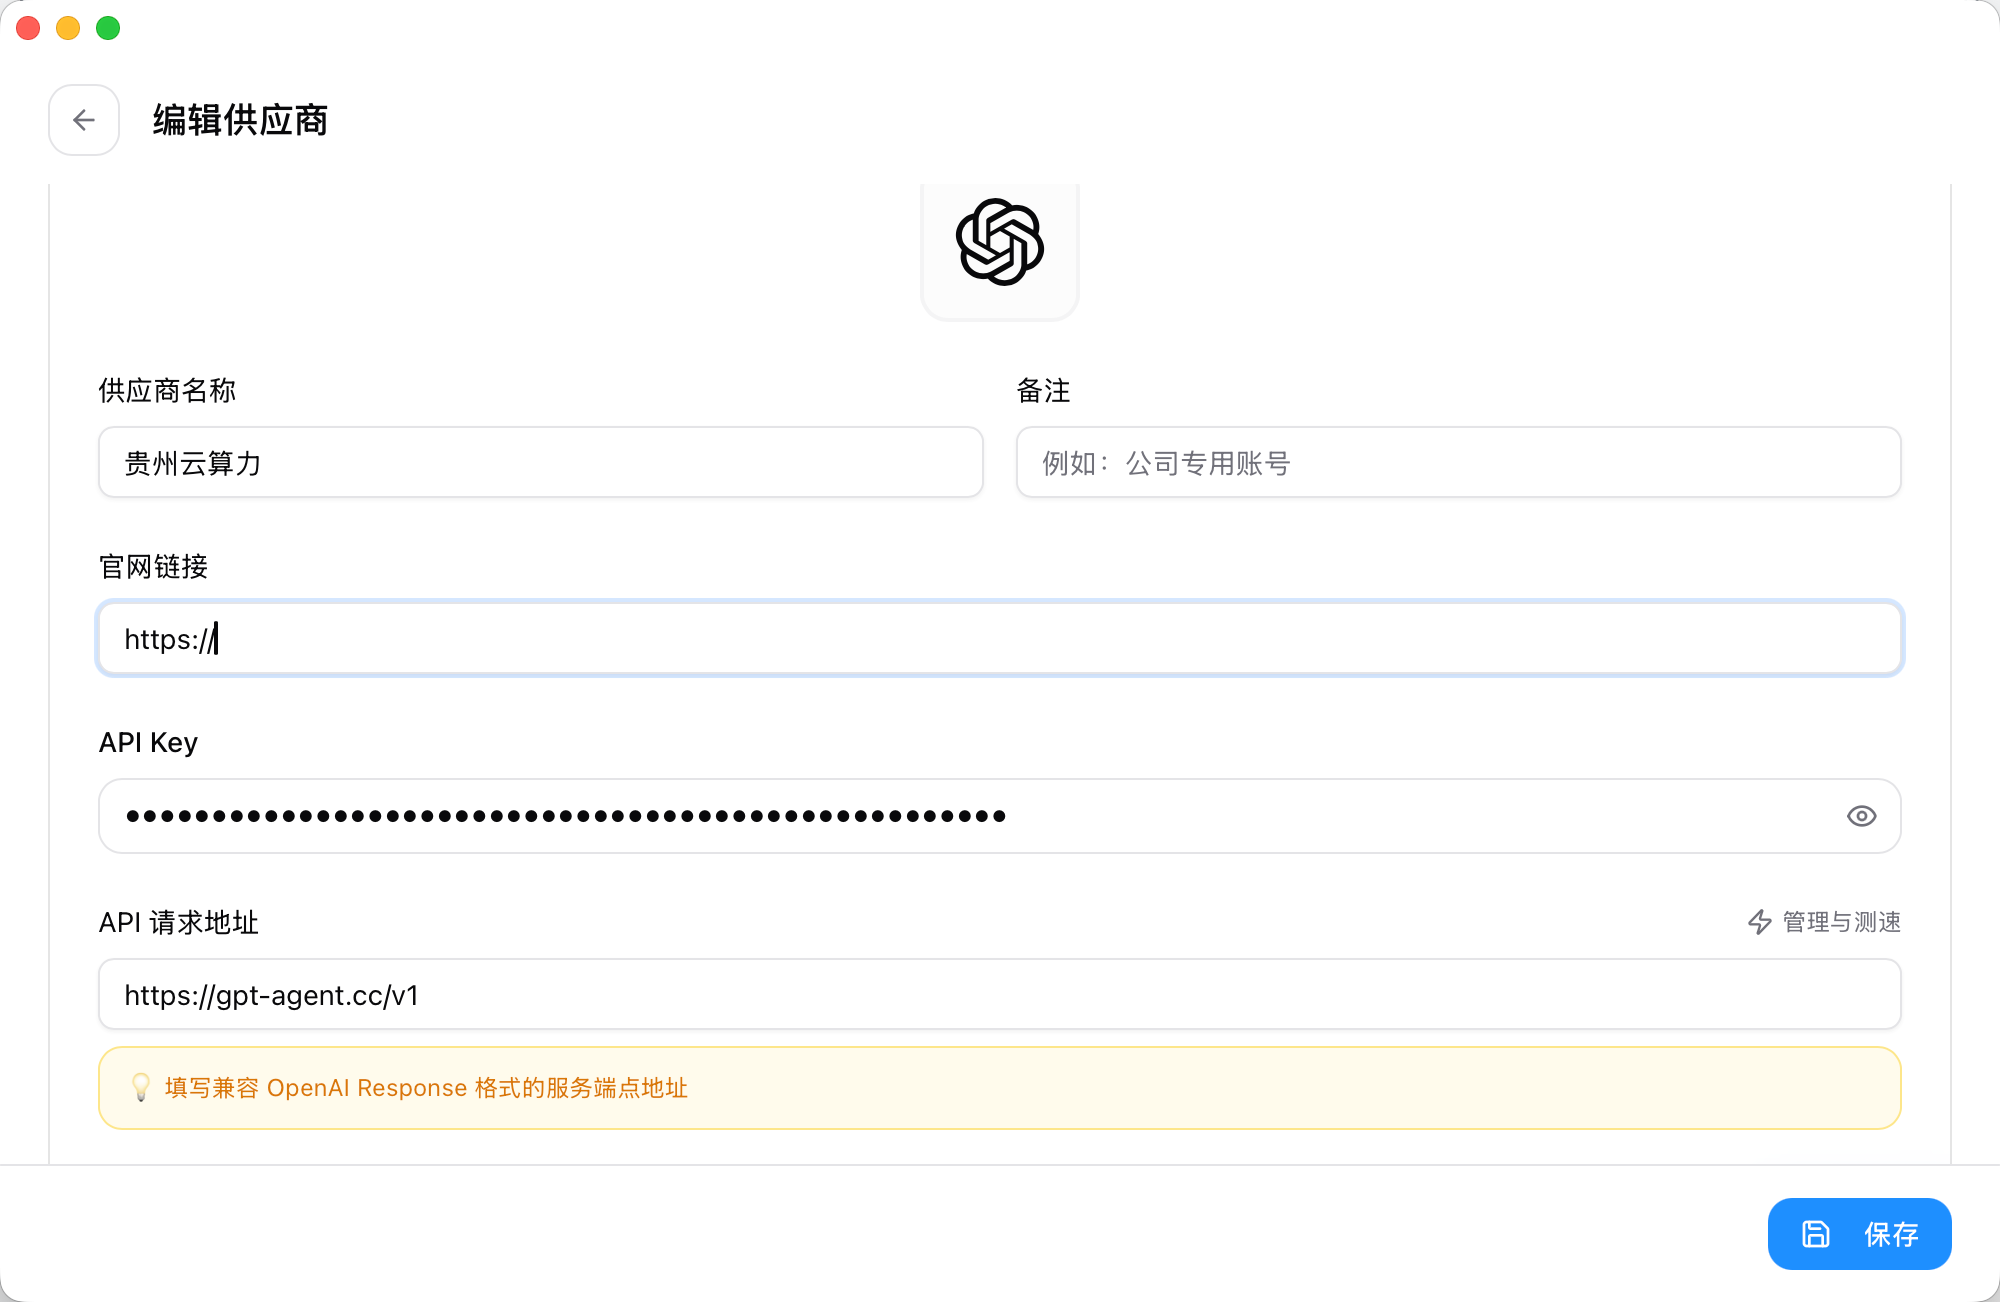 The Edit Provider Configuration screen in CC-Switch. The provider name i…
💡 Tip
- CC-Switch automatically creates the
~/.codex/config.tomlandauth.jsonfiles - You can add multiple provider configurations and switch between them at any time
- After switching configurations, close and restart Codex for the change to take effect
- Enable and use the configuration
- Find the configuration you just created in the configuration list
- Click “In Use” on the right side of the configuration
- The configuration will be marked “In Use” with a green label
- Restart Codex to apply the new configuration
- Switch quickly from the system tray
CC-Switch lets you switch Codex configurations from the system tray:
- Right-click the CC-Switch icon in the system tray
- Select the Codex category from the menu
- Select the configuration you want to use
- The configuration takes effect immediately without opening the main window
⚠️ Important
- You must restart Codex after switching configurations
- You can test API endpoint speed in CC-Switch
⌨️ Manual Command-Line Setup
If you do not use CC-Switch, follow the steps below to configure Codex manually.
🖥️ Windows
Step One: Install the Codex Command-Line Tool
Launch Command Prompt or PowerShell as an administrator, then run:
npm install -g @openai/codex@latest
codex --version
Create the configuration file: config.toml
model_provider = "gpt-agent"
model = "gpt-5.5"

[model_providers.gpt-agent]
name = "LLM API Gateway"
base_url = "https://api.llm-token.cn/v1"
wire_api = "responses"
requires_openai_auth = true
Create the authentication file: auth.json
{
  "OPENAI_API_KEY": "YOUR_API_KEY"
}
Step Three: Initialize the Workspace
mkdir my-codex-project
cd my-codex-project
codex
🍏 macOS
Install the Codex Tool
npm install -g @openai/codex@latest
codex --version
Integrate the API Service
Create the configuration directory:
mkdir -p ~/.codex
cd ~/.codex
Create the config.toml configuration:
cat > config.toml << 'EOF'
model_provider = "gpt-agent"
model = "gpt-5.5"

[model_providers.gpt-agent]
name = "LLM API Gateway"
base_url = "https://api.llm-token.cn/v1"
wire_api = "responses"
requires_openai_auth = true
EOF
Create the auth.json authentication configuration:
cat > auth.json << 'EOF'
{
  "OPENAI_API_KEY": "YOUR_API_KEY"
}
EOF
Initialize the Workspace
mkdir my-codex-project
cd my-codex-project
codex
🐧 Linux
Install the Codex Tool
sudo npm install -g @openai/codex@latest
codex --version
Integrate the API Service
Create the configuration directory:
mkdir -p ~/.codex
cd ~/.codex
Create the config.toml configuration:
cat > config.toml << 'EOF'
model_provider = "gpt-agent"
model = "gpt-5.5"

[model_providers.gpt-agent]
name = "LLM API Gateway"
base_url = "https://api.llm-token.cn/v1"
wire_api = "responses"
requires_openai_auth = true
EOF
Create the auth.json authentication configuration:
cat > auth.json << 'EOF'
{
  "OPENAI_API_KEY": "YOUR_API_KEY"
}
EOF
Initialize the Workspace
mkdir my-codex-project
cd my-codex-project
codex
Where Are the Configuration Files Stored?
- Windows:
%USERPROFILE%\.codex\ - macOS/Linux:
~/.codex/
Configured but Unable to Chat?
Try the steps below. If the issue persists, contact support.
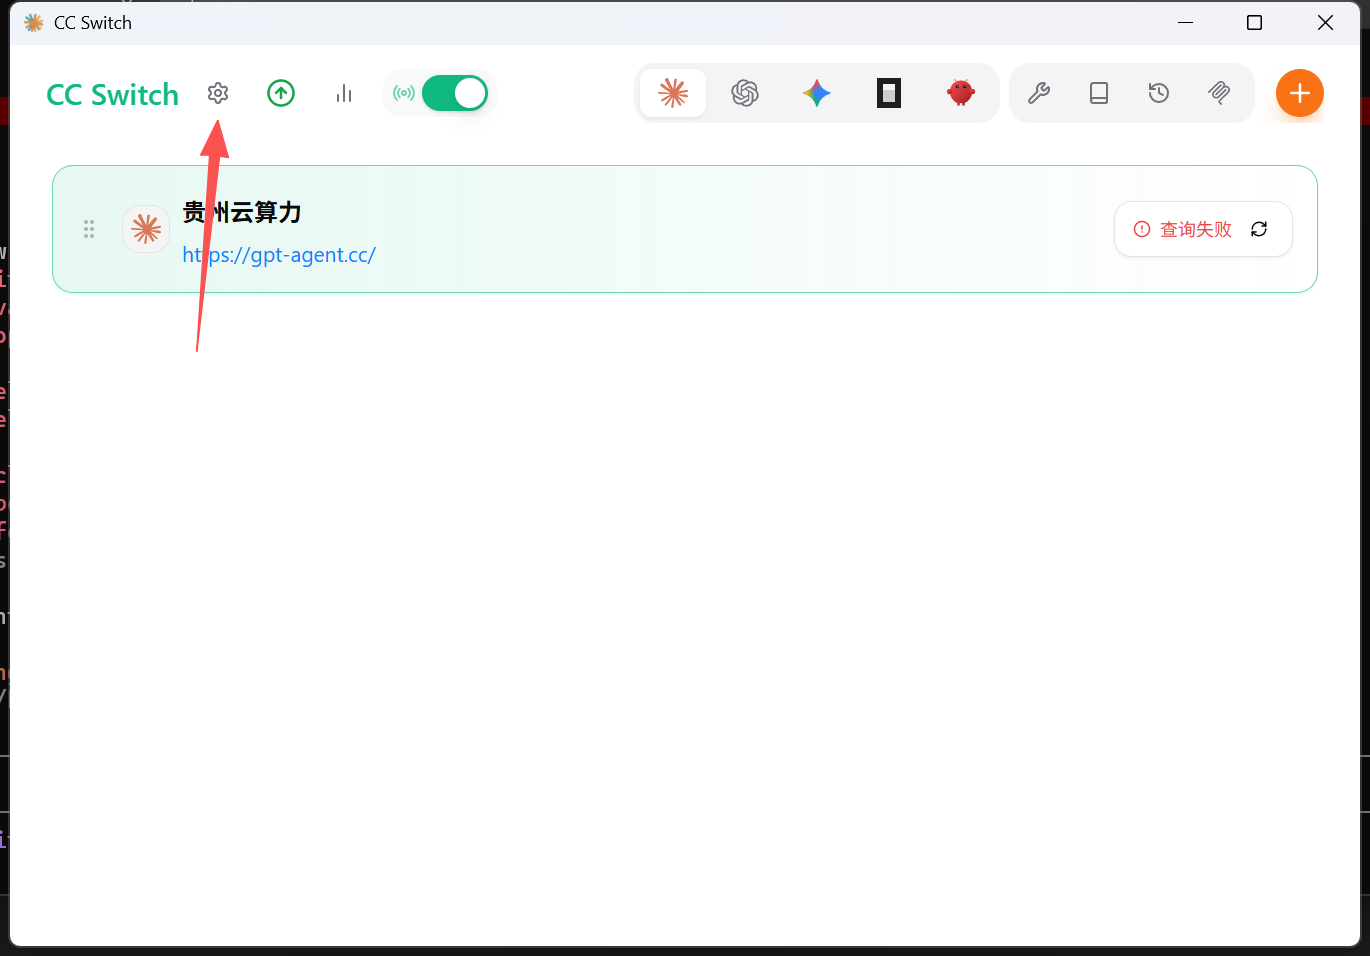 The CC Switch interface with the “LLM API Gateway” row highlighted in gr…
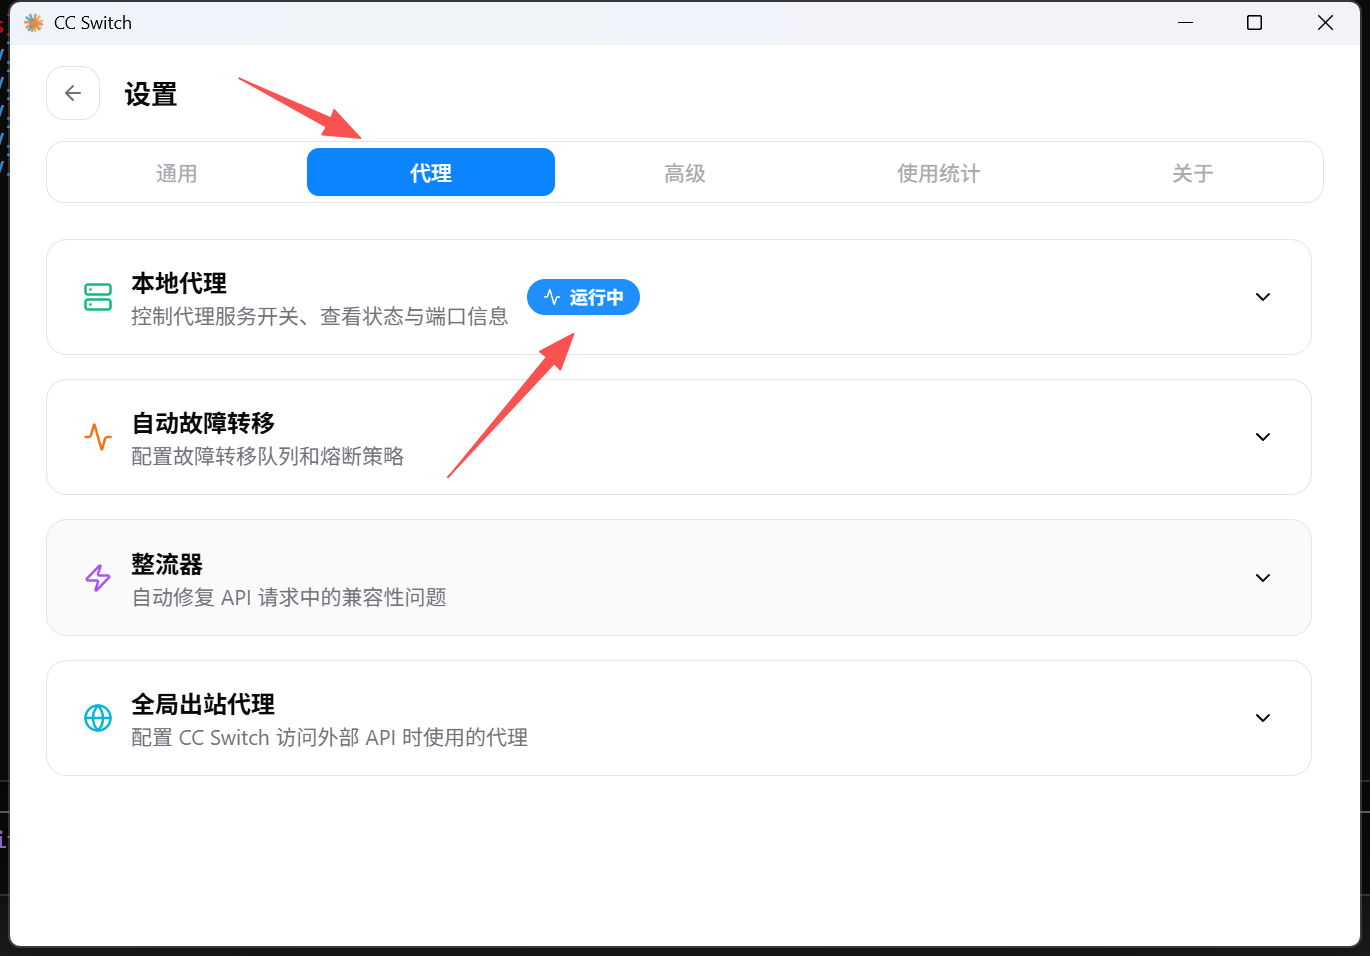 The CC Switch Settings screen. Red arrows point to the “Proxy” tab at th…
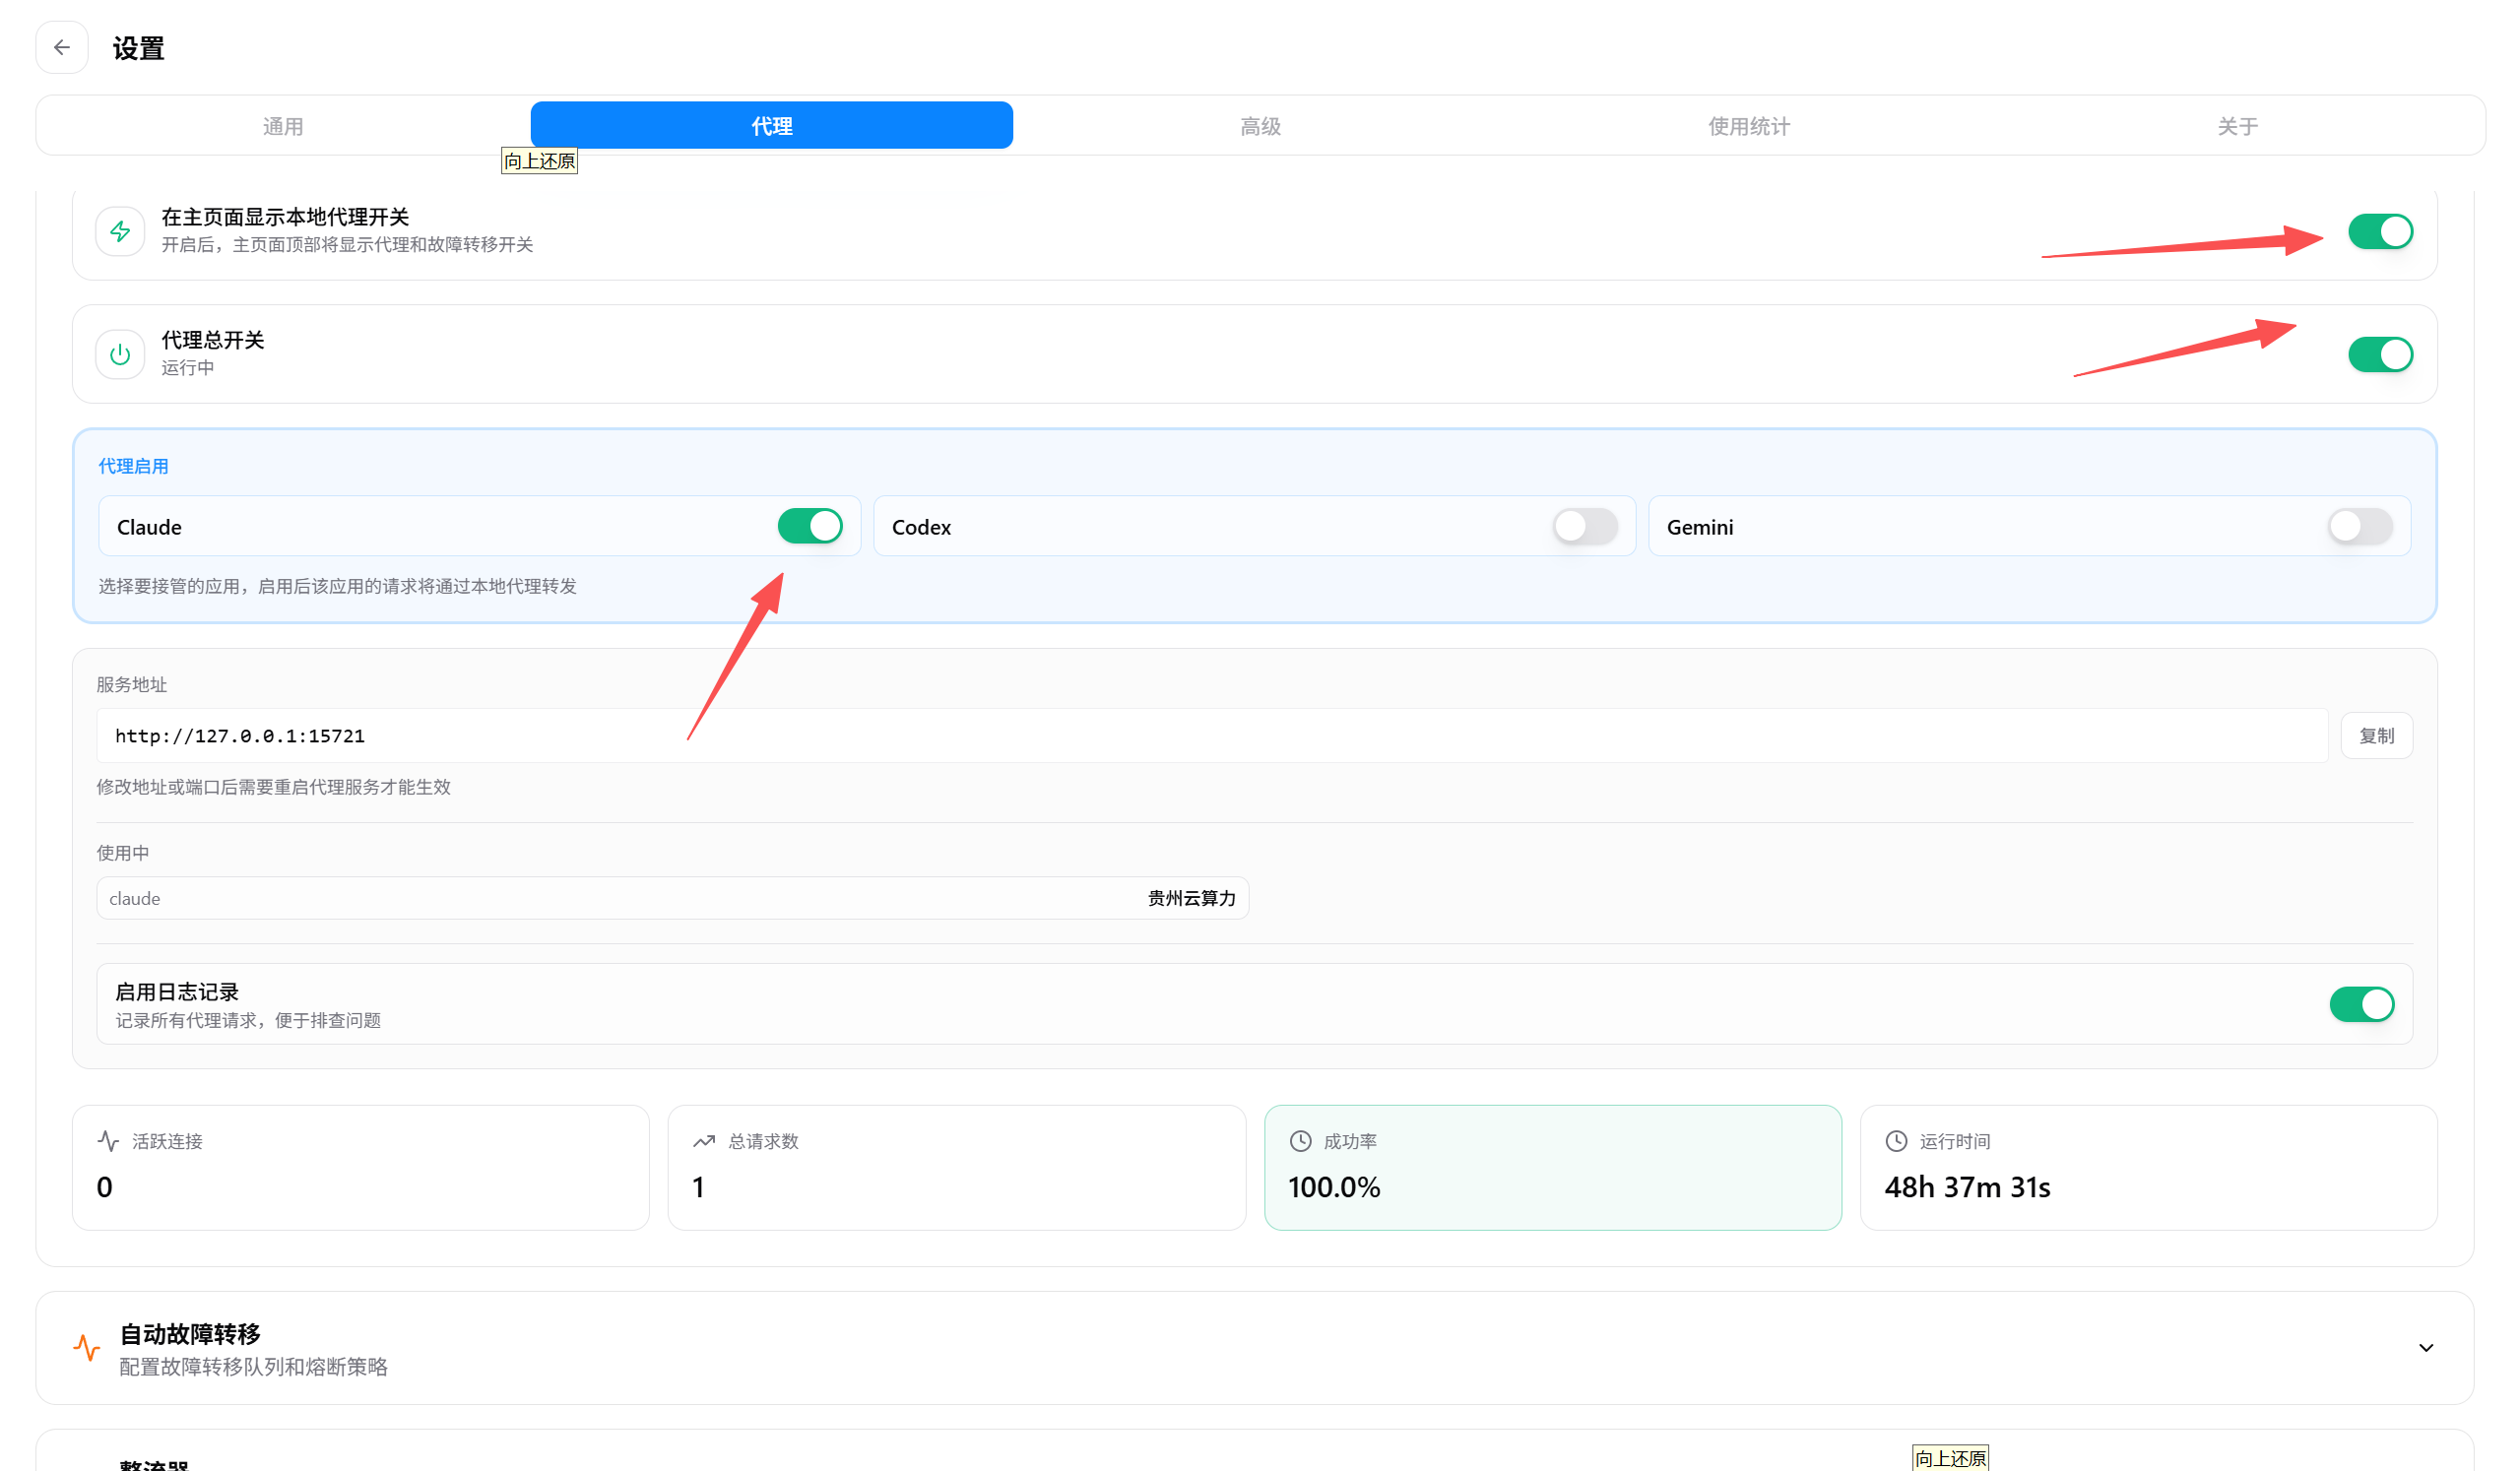 Proxy-related settings in the Codex deployment guide. The General, Proxy…