gpt-image-2 Image Generation Setup Guide
Learn how to use gpt-image-2 with Cherry Studio, Skills, and scripts.
Recommended approach: If you are a regular user, start with the web app for one-click image generation. Use the image generation endpoint https://api.llm-token.cn/v1/images/generations only when connecting a client or automation tool, and set the model ID to gpt-image-2.
| Item | Value | Description |
|---|---|---|
| Web app | https://image2.gpt-agent.cc/ | The recommended option. Beginners do not need to manage API parameters. |
| API endpoint | https://api.llm-token.cn/v1/images/generations | For Cherry Studio, Skills, scripts, and similar tools. |
| Model ID | gpt-image-2 | Enter the complete ID exactly as shown. |
| API Key | sk-xxxxxxxx | Use your own API key. |
About timeouts: High-resolution or 4K images may take 70-150 seconds to generate. If a client such as Cherry Studio has a fixed timeout, it may decide that the request failed and retry while the image is still being generated. If this happens, use the web app to avoid duplicate requests.
1. Use the Web App
- Open https://image2.gpt-agent.cc/ in your browser.
- Click Settings in the upper-right corner and enter your API Key.
- Select
gpt-image-2and enter your prompt. - Choose the format, quality, aspect ratio, and number of images as needed, then click Generate.
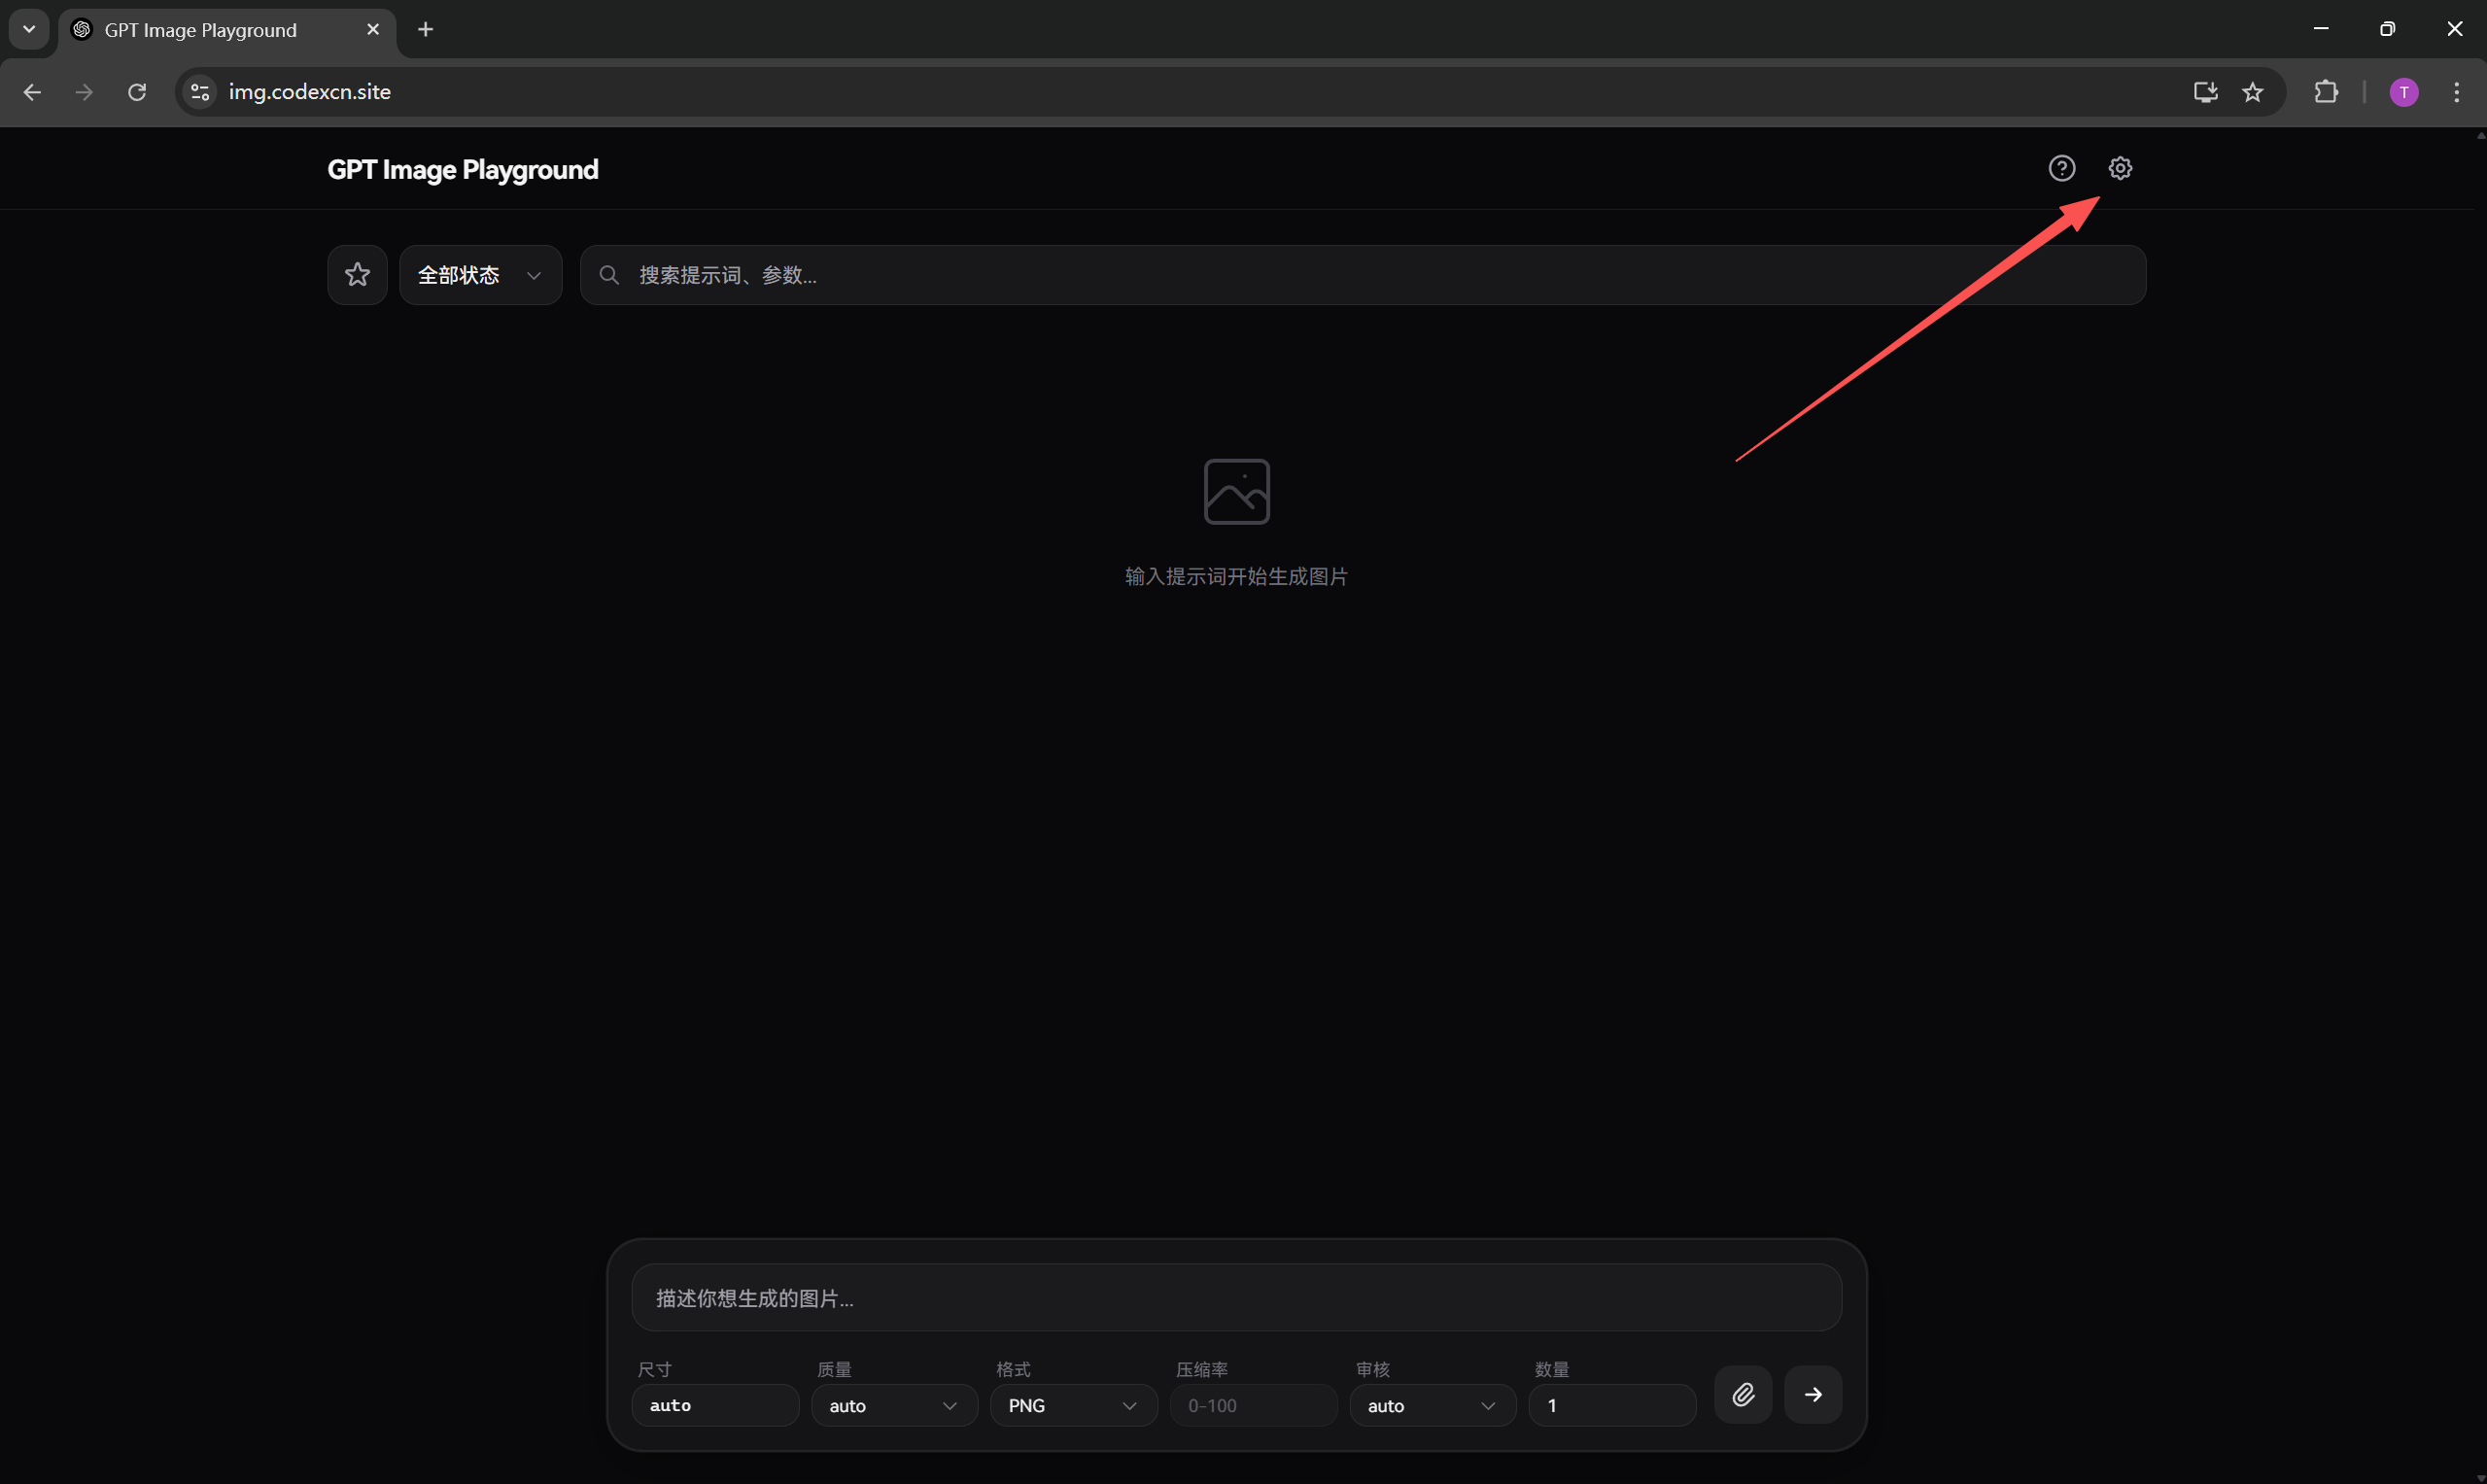 The GPT Image Playground web interface. A red arrow points to the Settin…
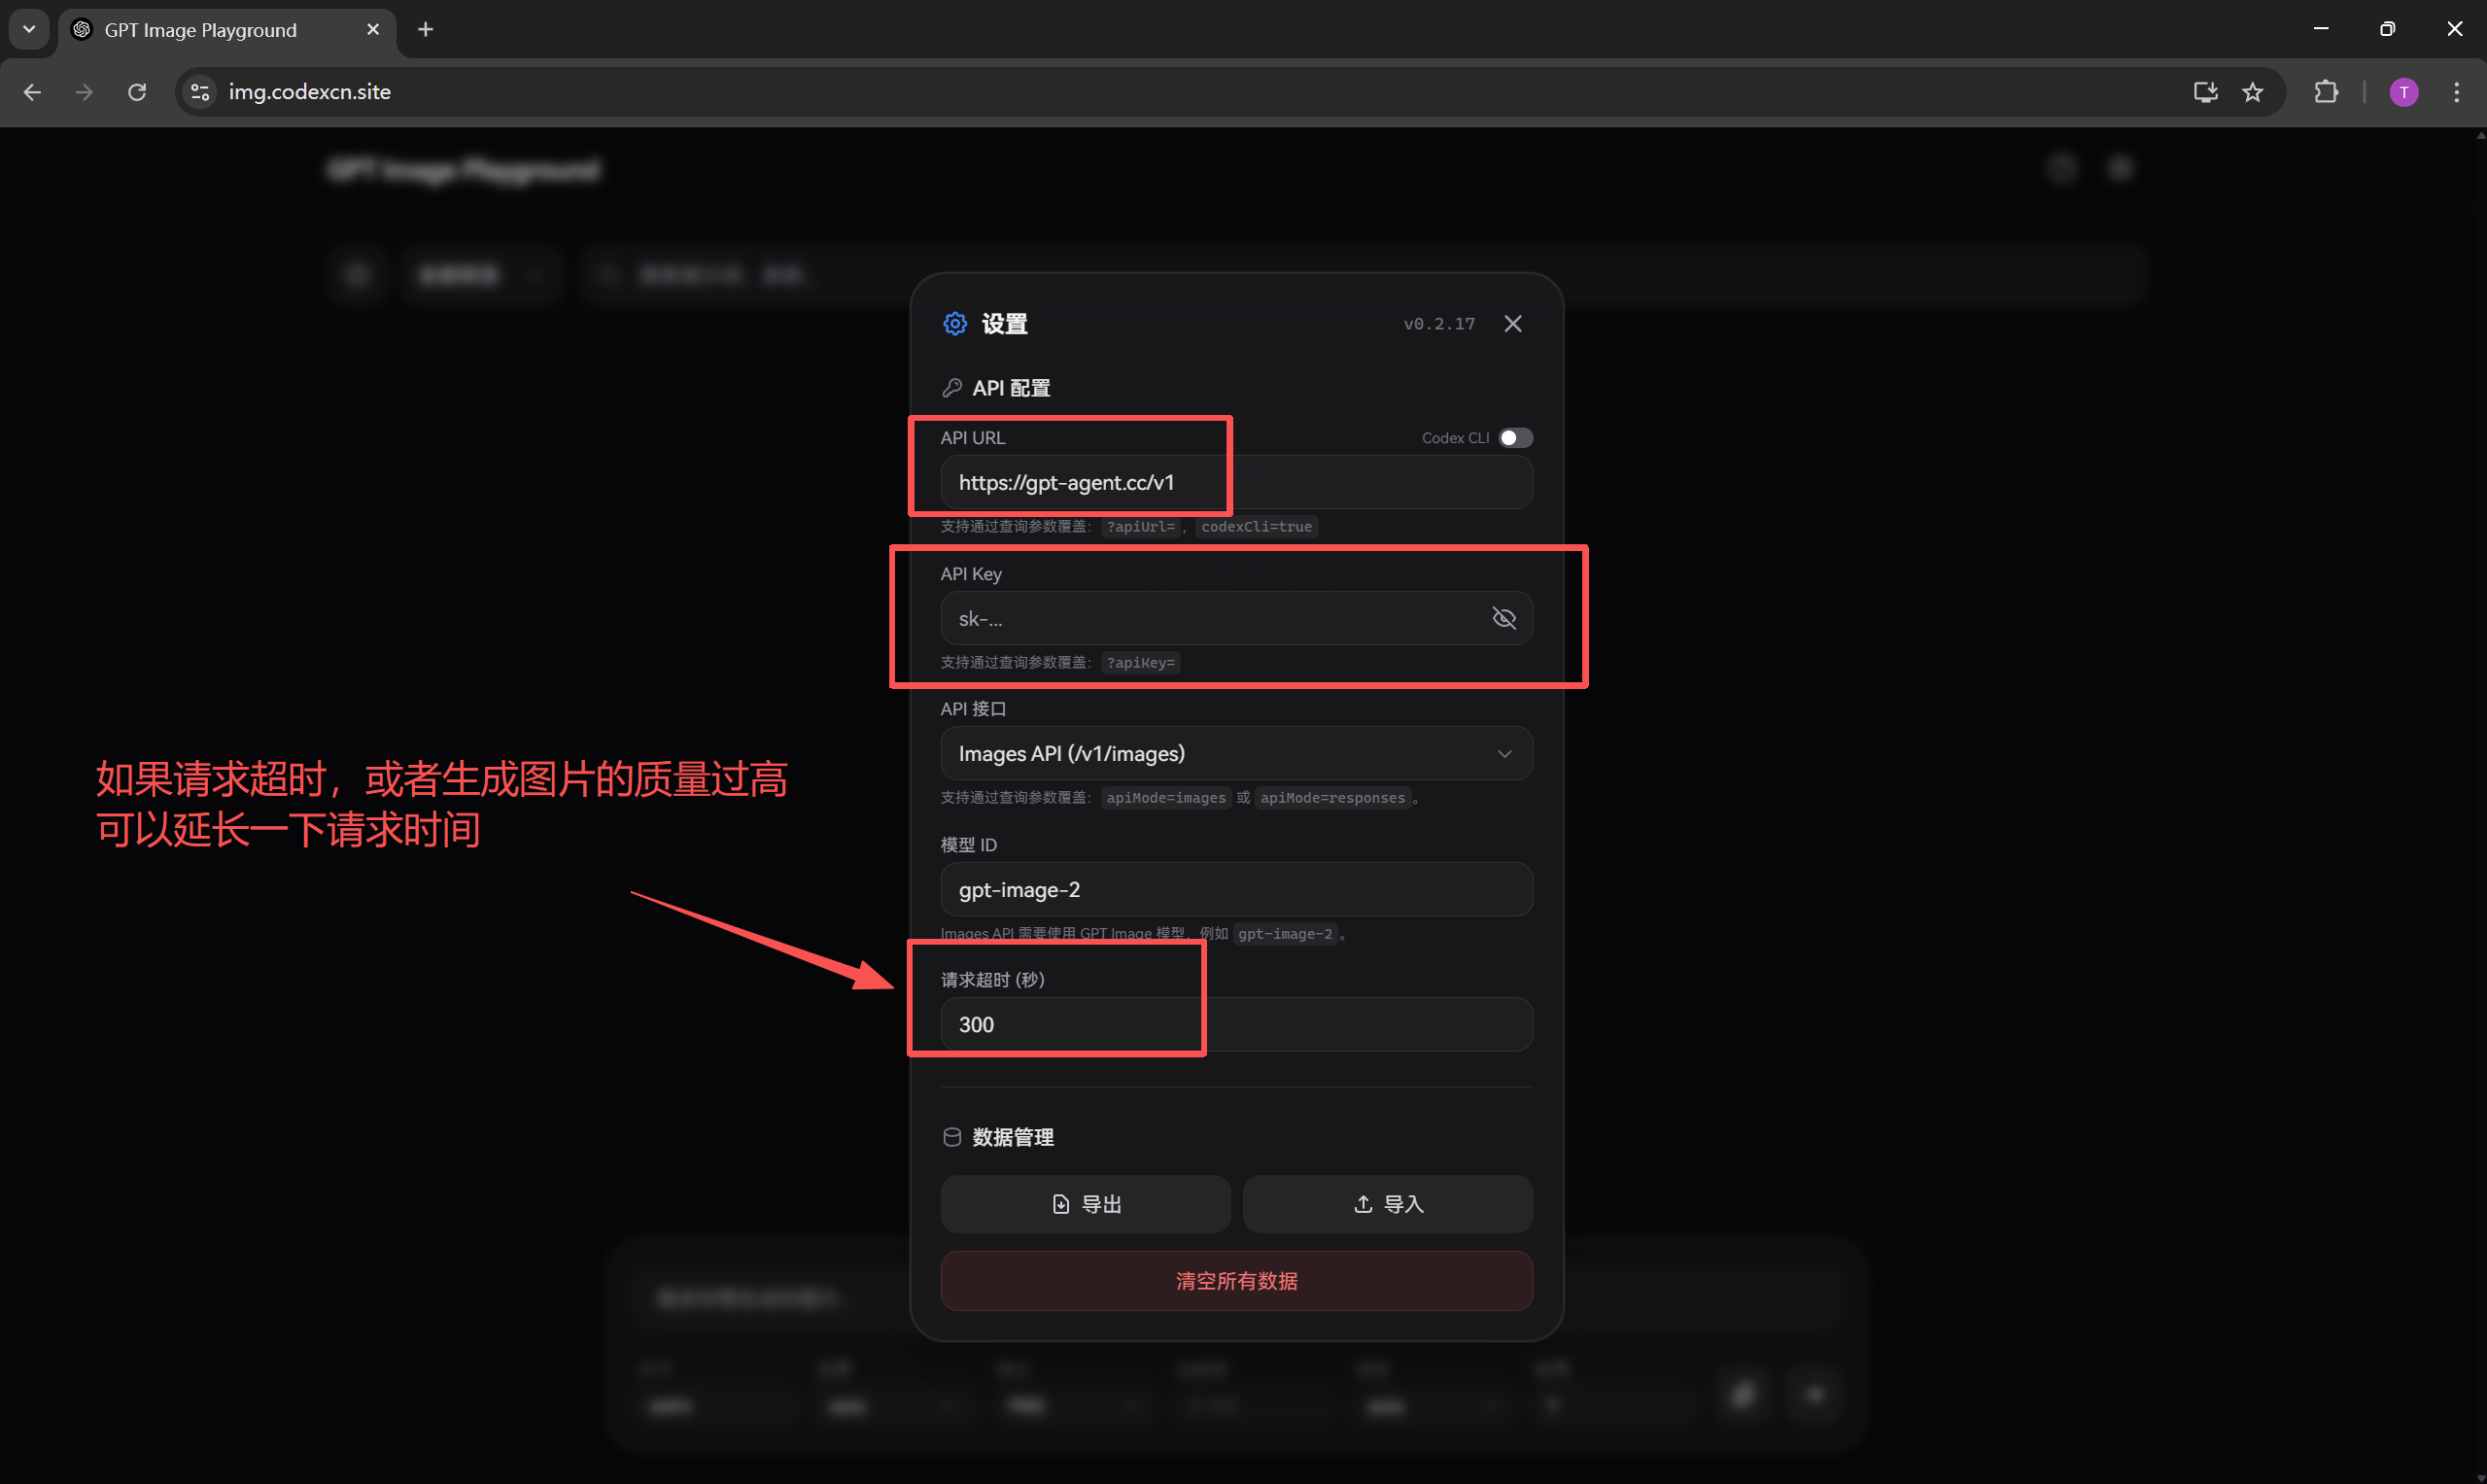 The gpt-image-2 setup screen in the web app. Key settings such as API UR…
Common parameters include the prompt, format, quality, aspect ratio, and number of images. If you are new to the tool, keep the defaults and change only the prompt and aspect ratio.
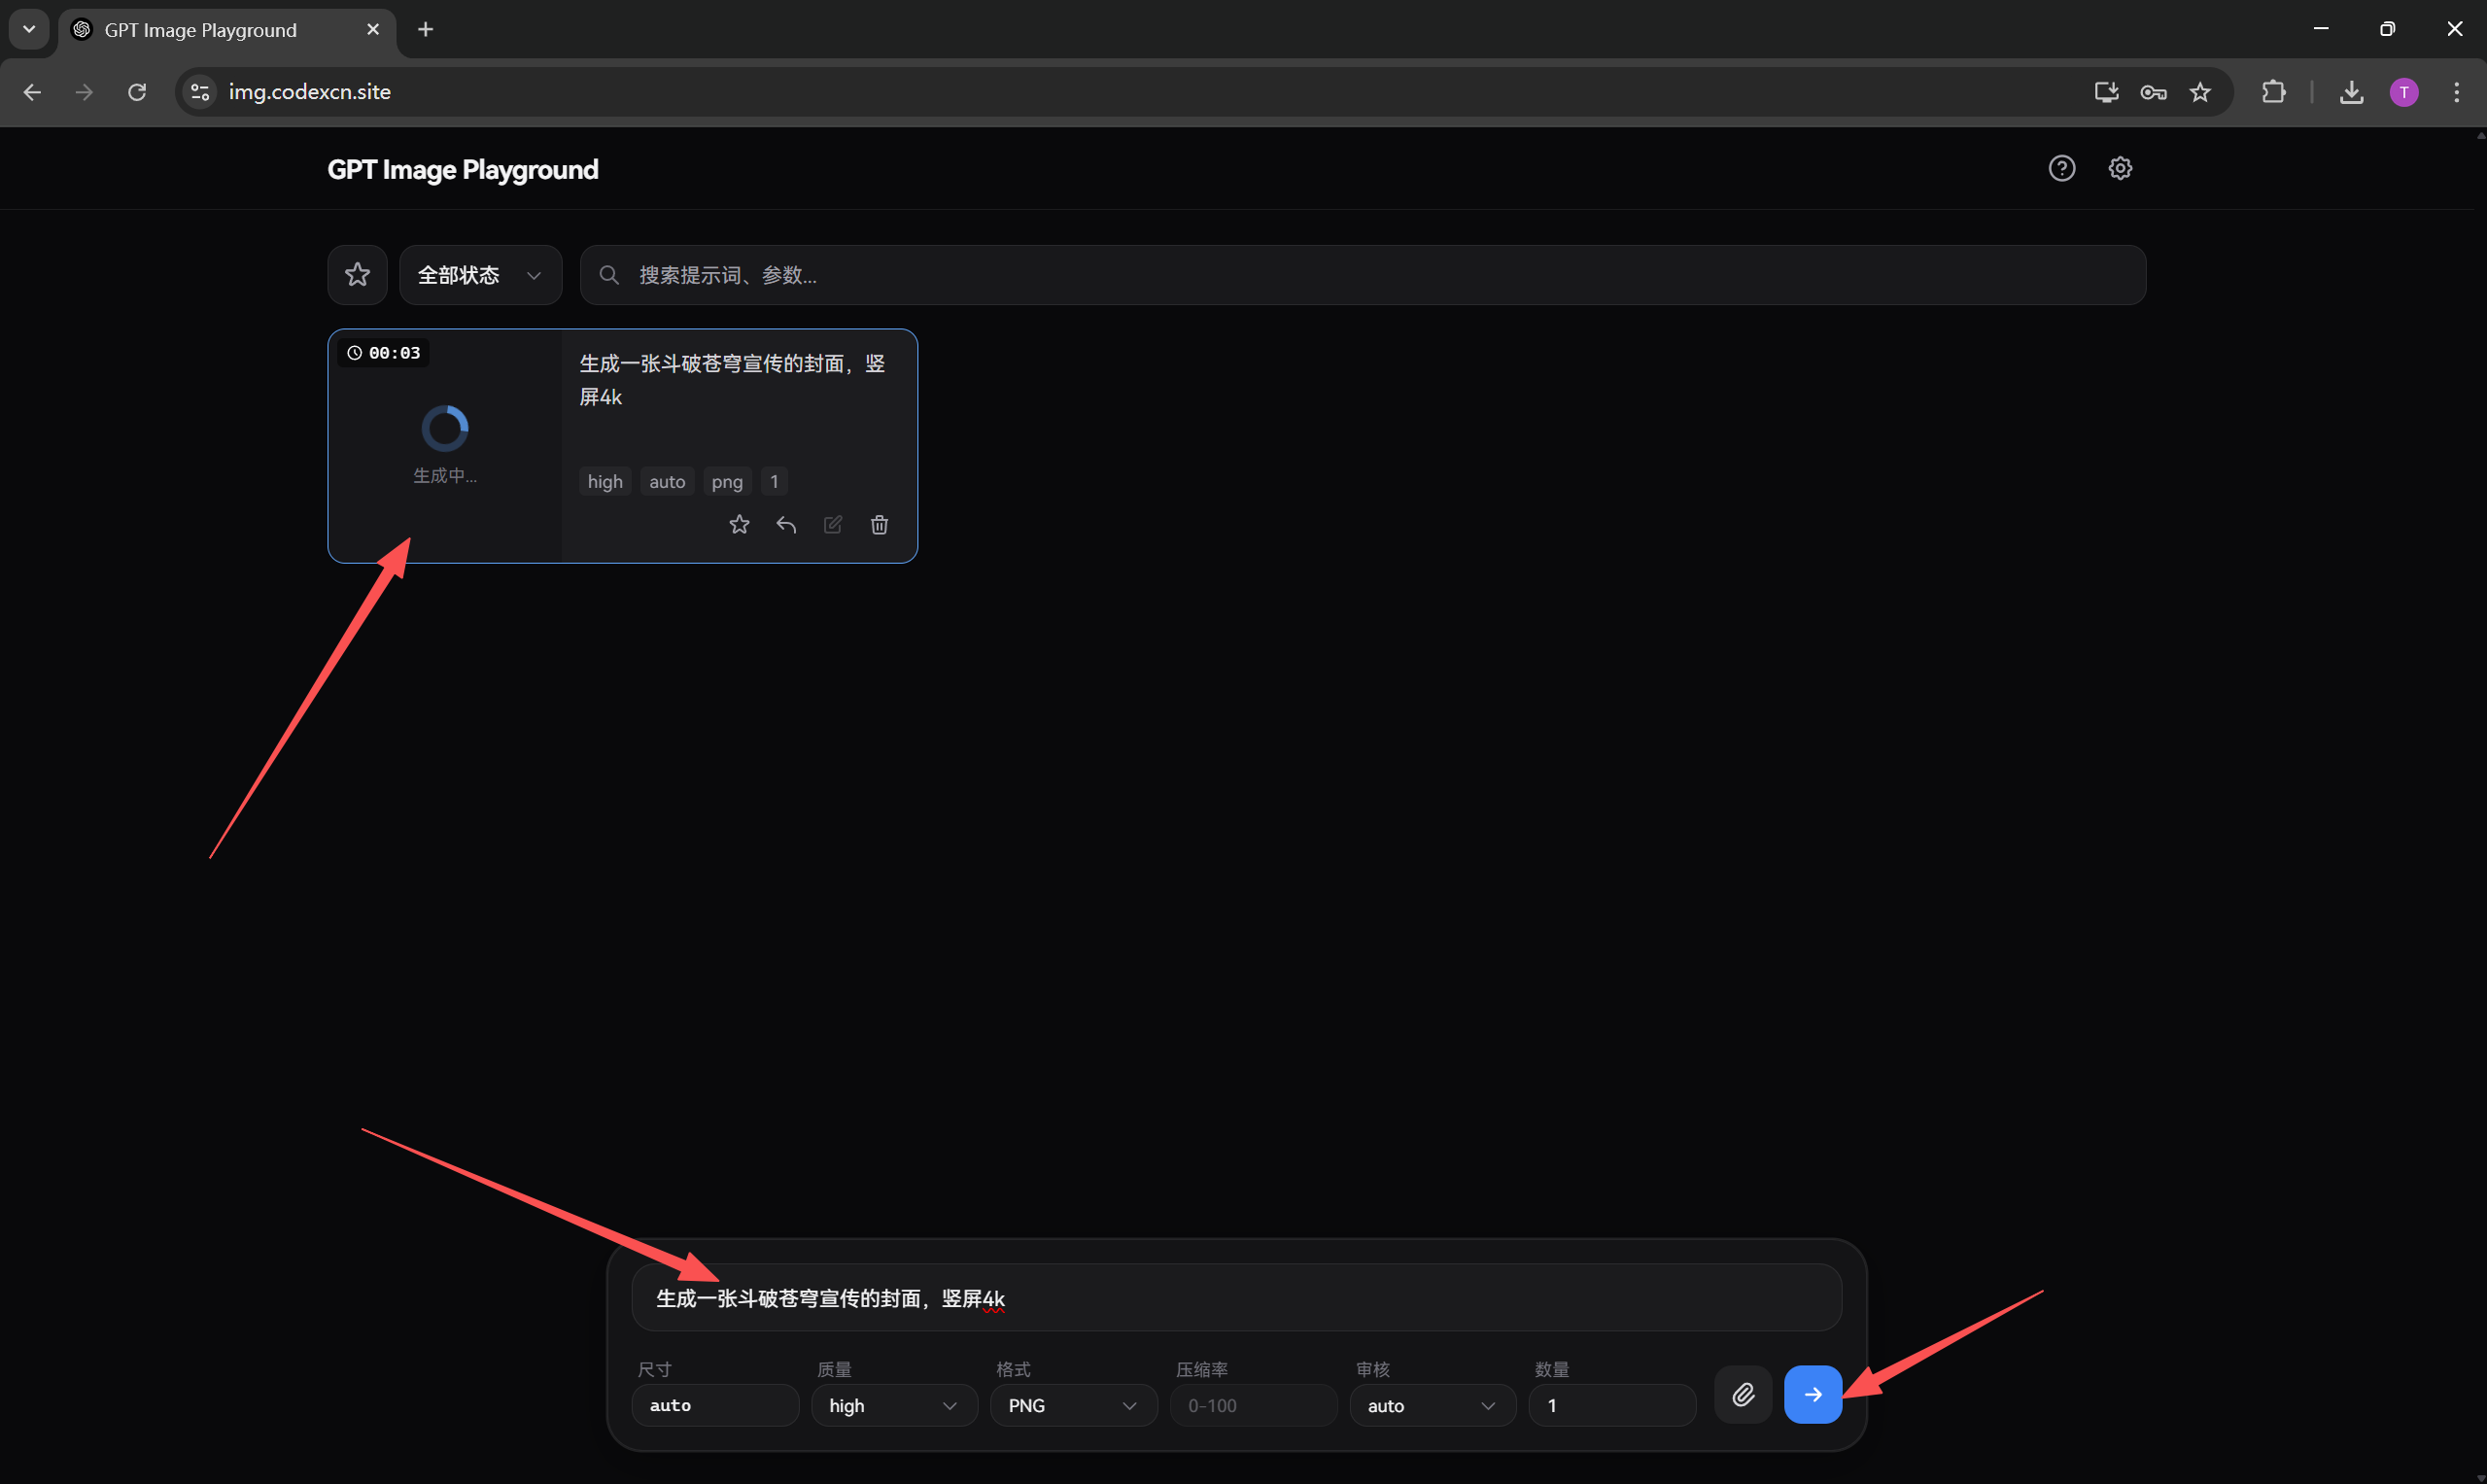 The GPT Image Playground interface with an All Experiments menu and a pr…
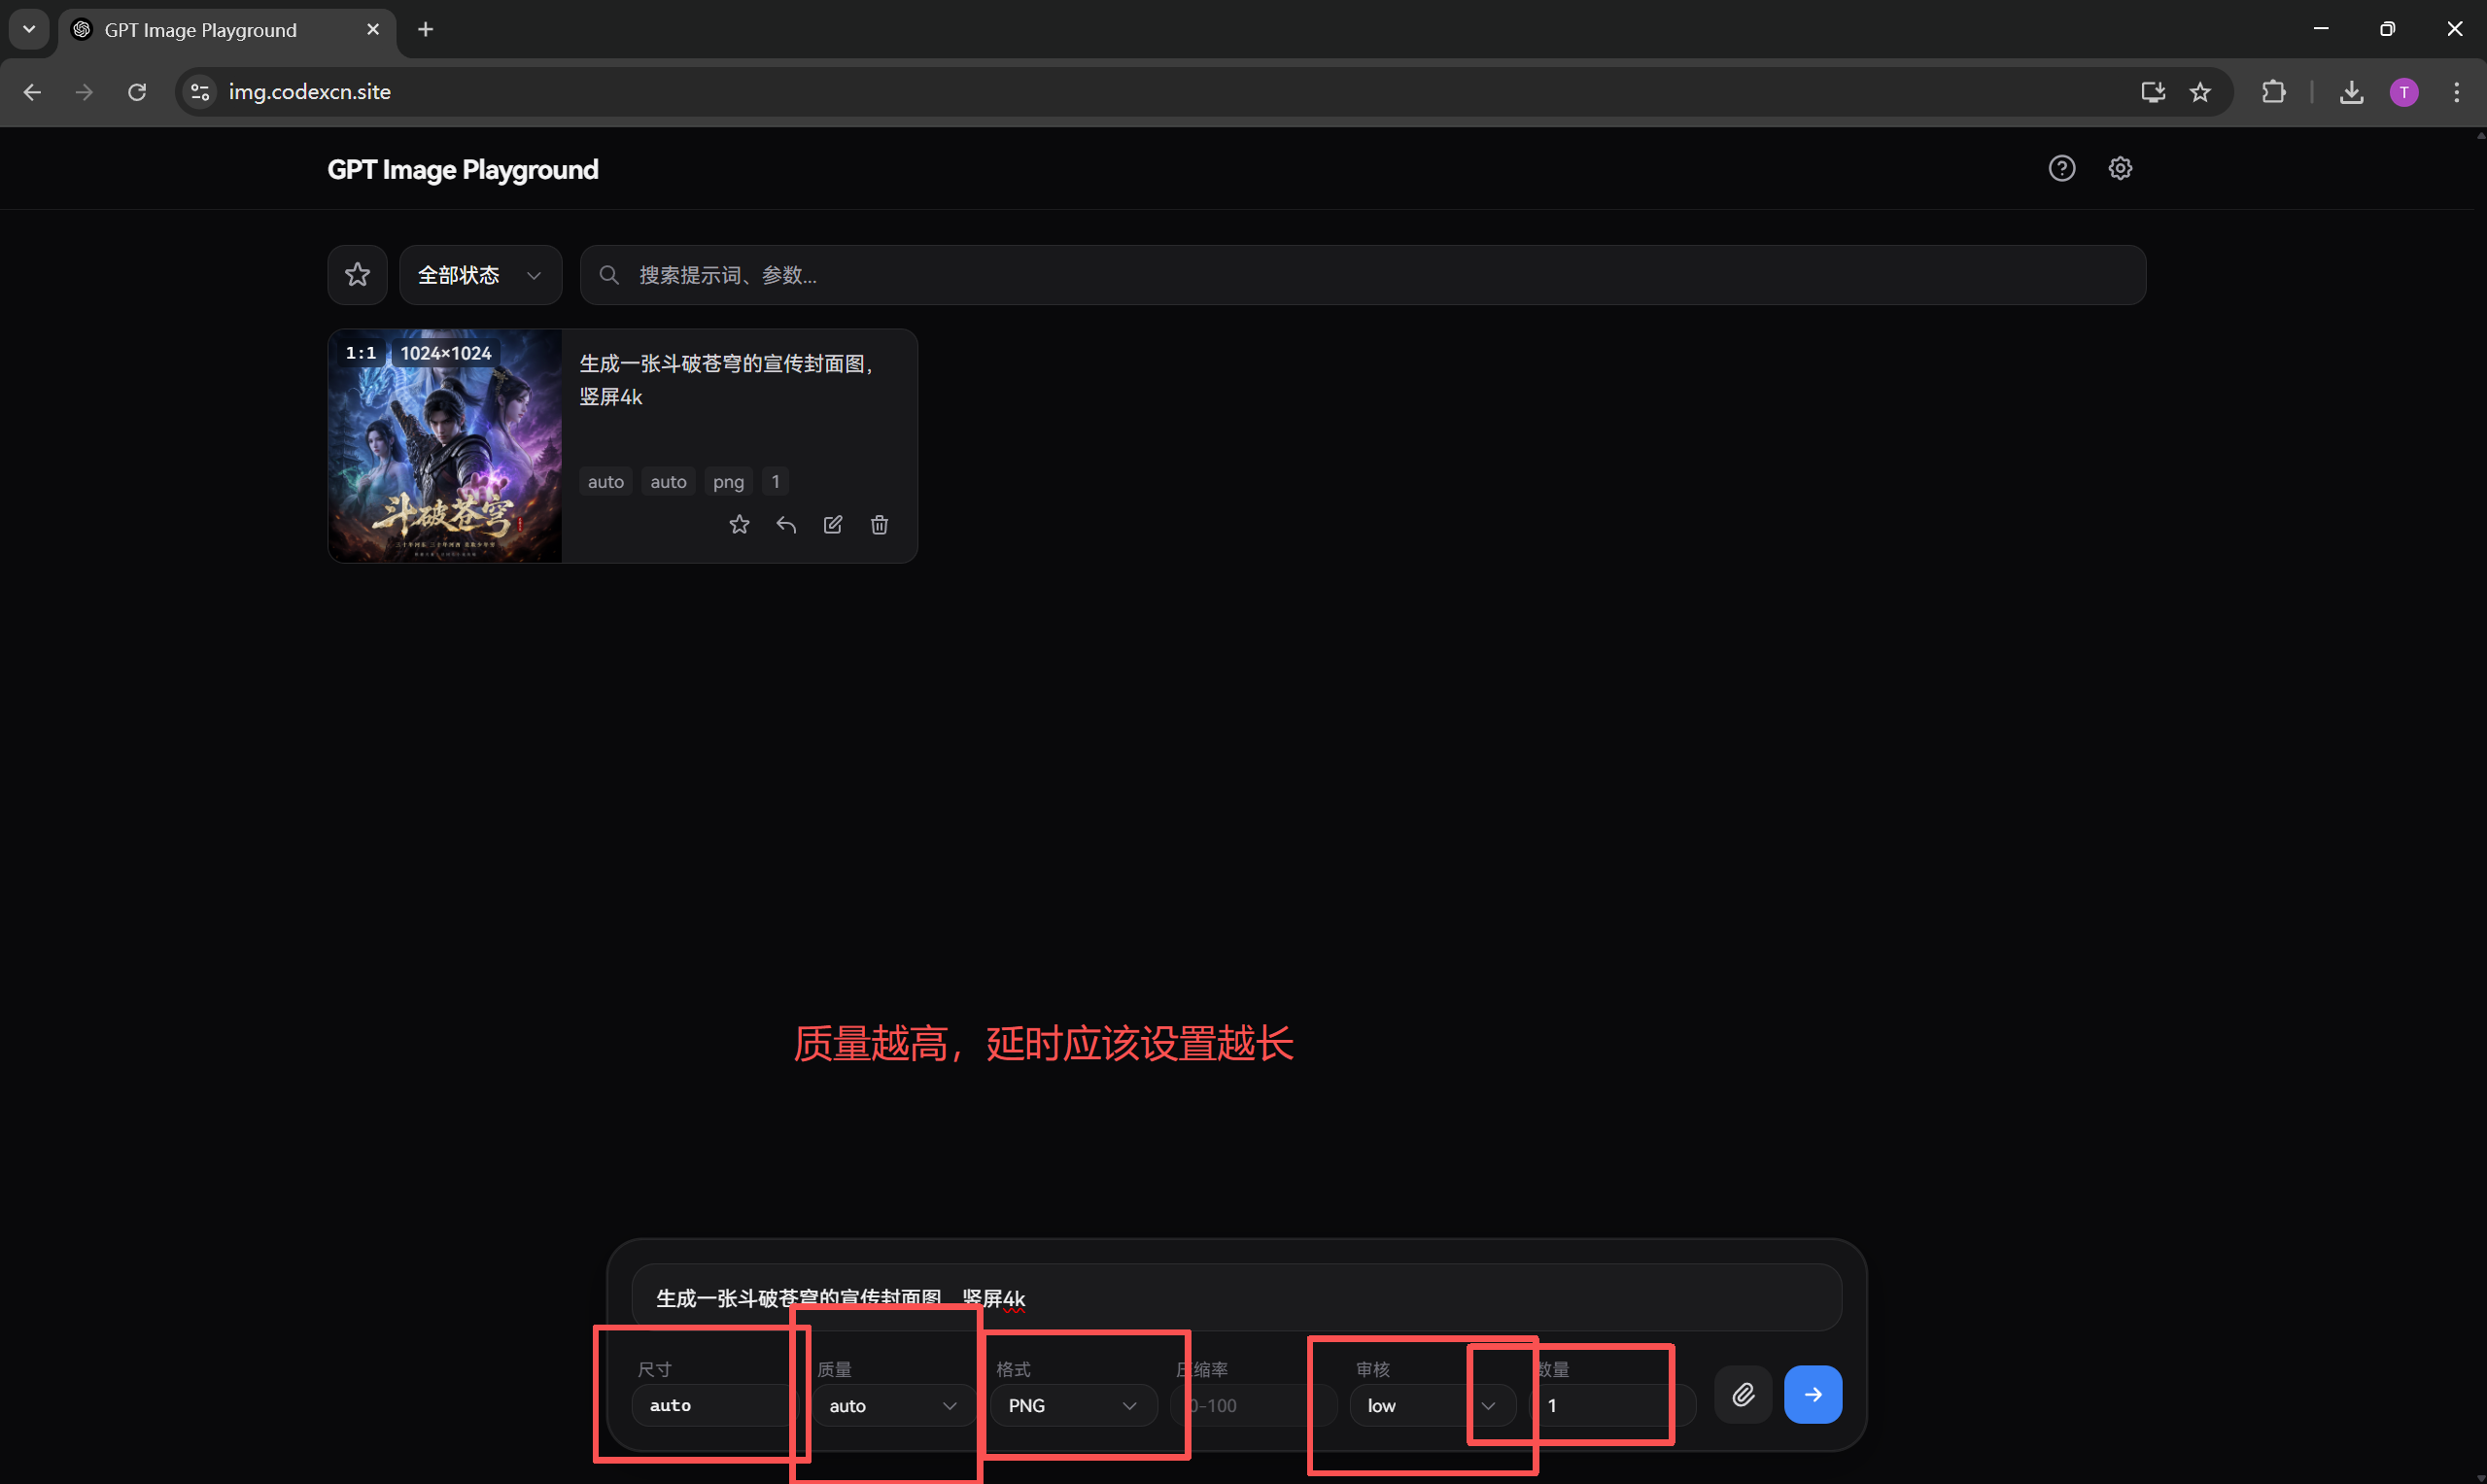 The image generation parameter area in GPT Image Playground. Four parame…
2. Edit an Existing Image
To make a targeted edit, transfer the style, or improve an existing image, upload the original image first. Then clearly describe what to change, what to preserve, and the desired final style.
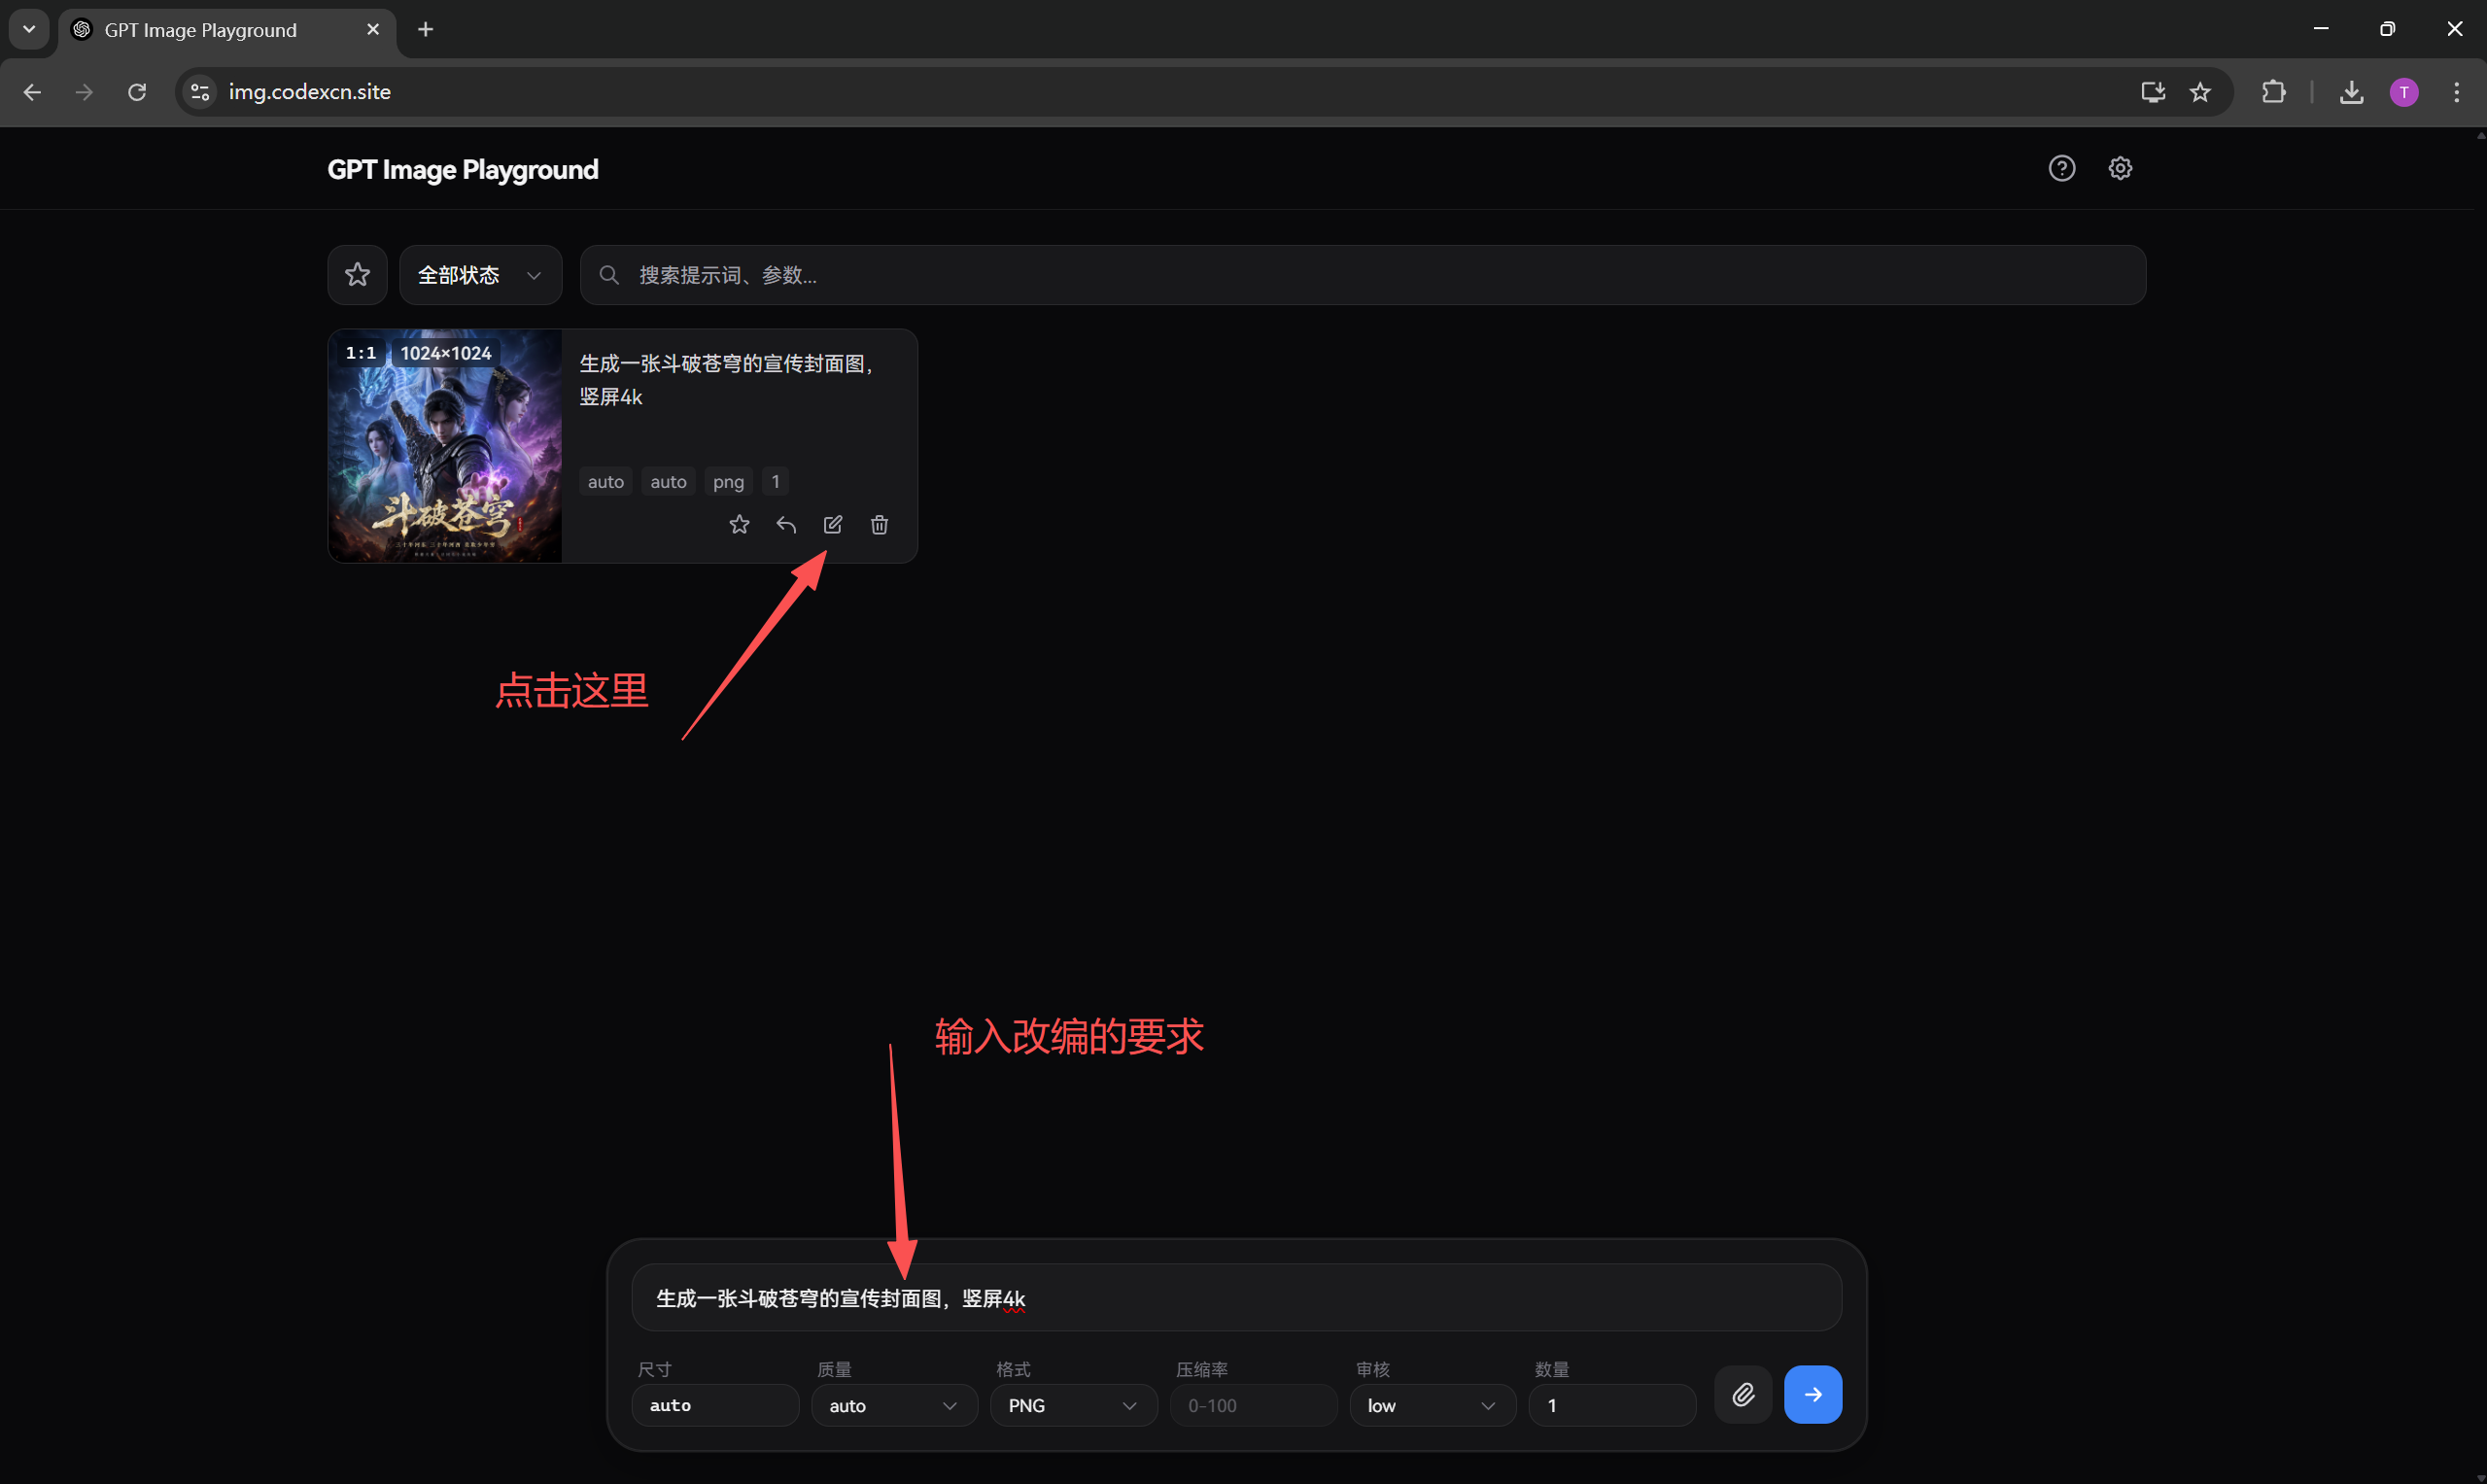 The GPT Image Playground interface for editing an existing image. A red…
3. Save the Generated Image
After generation finishes, right-click the image to save it or use the download button on the page.
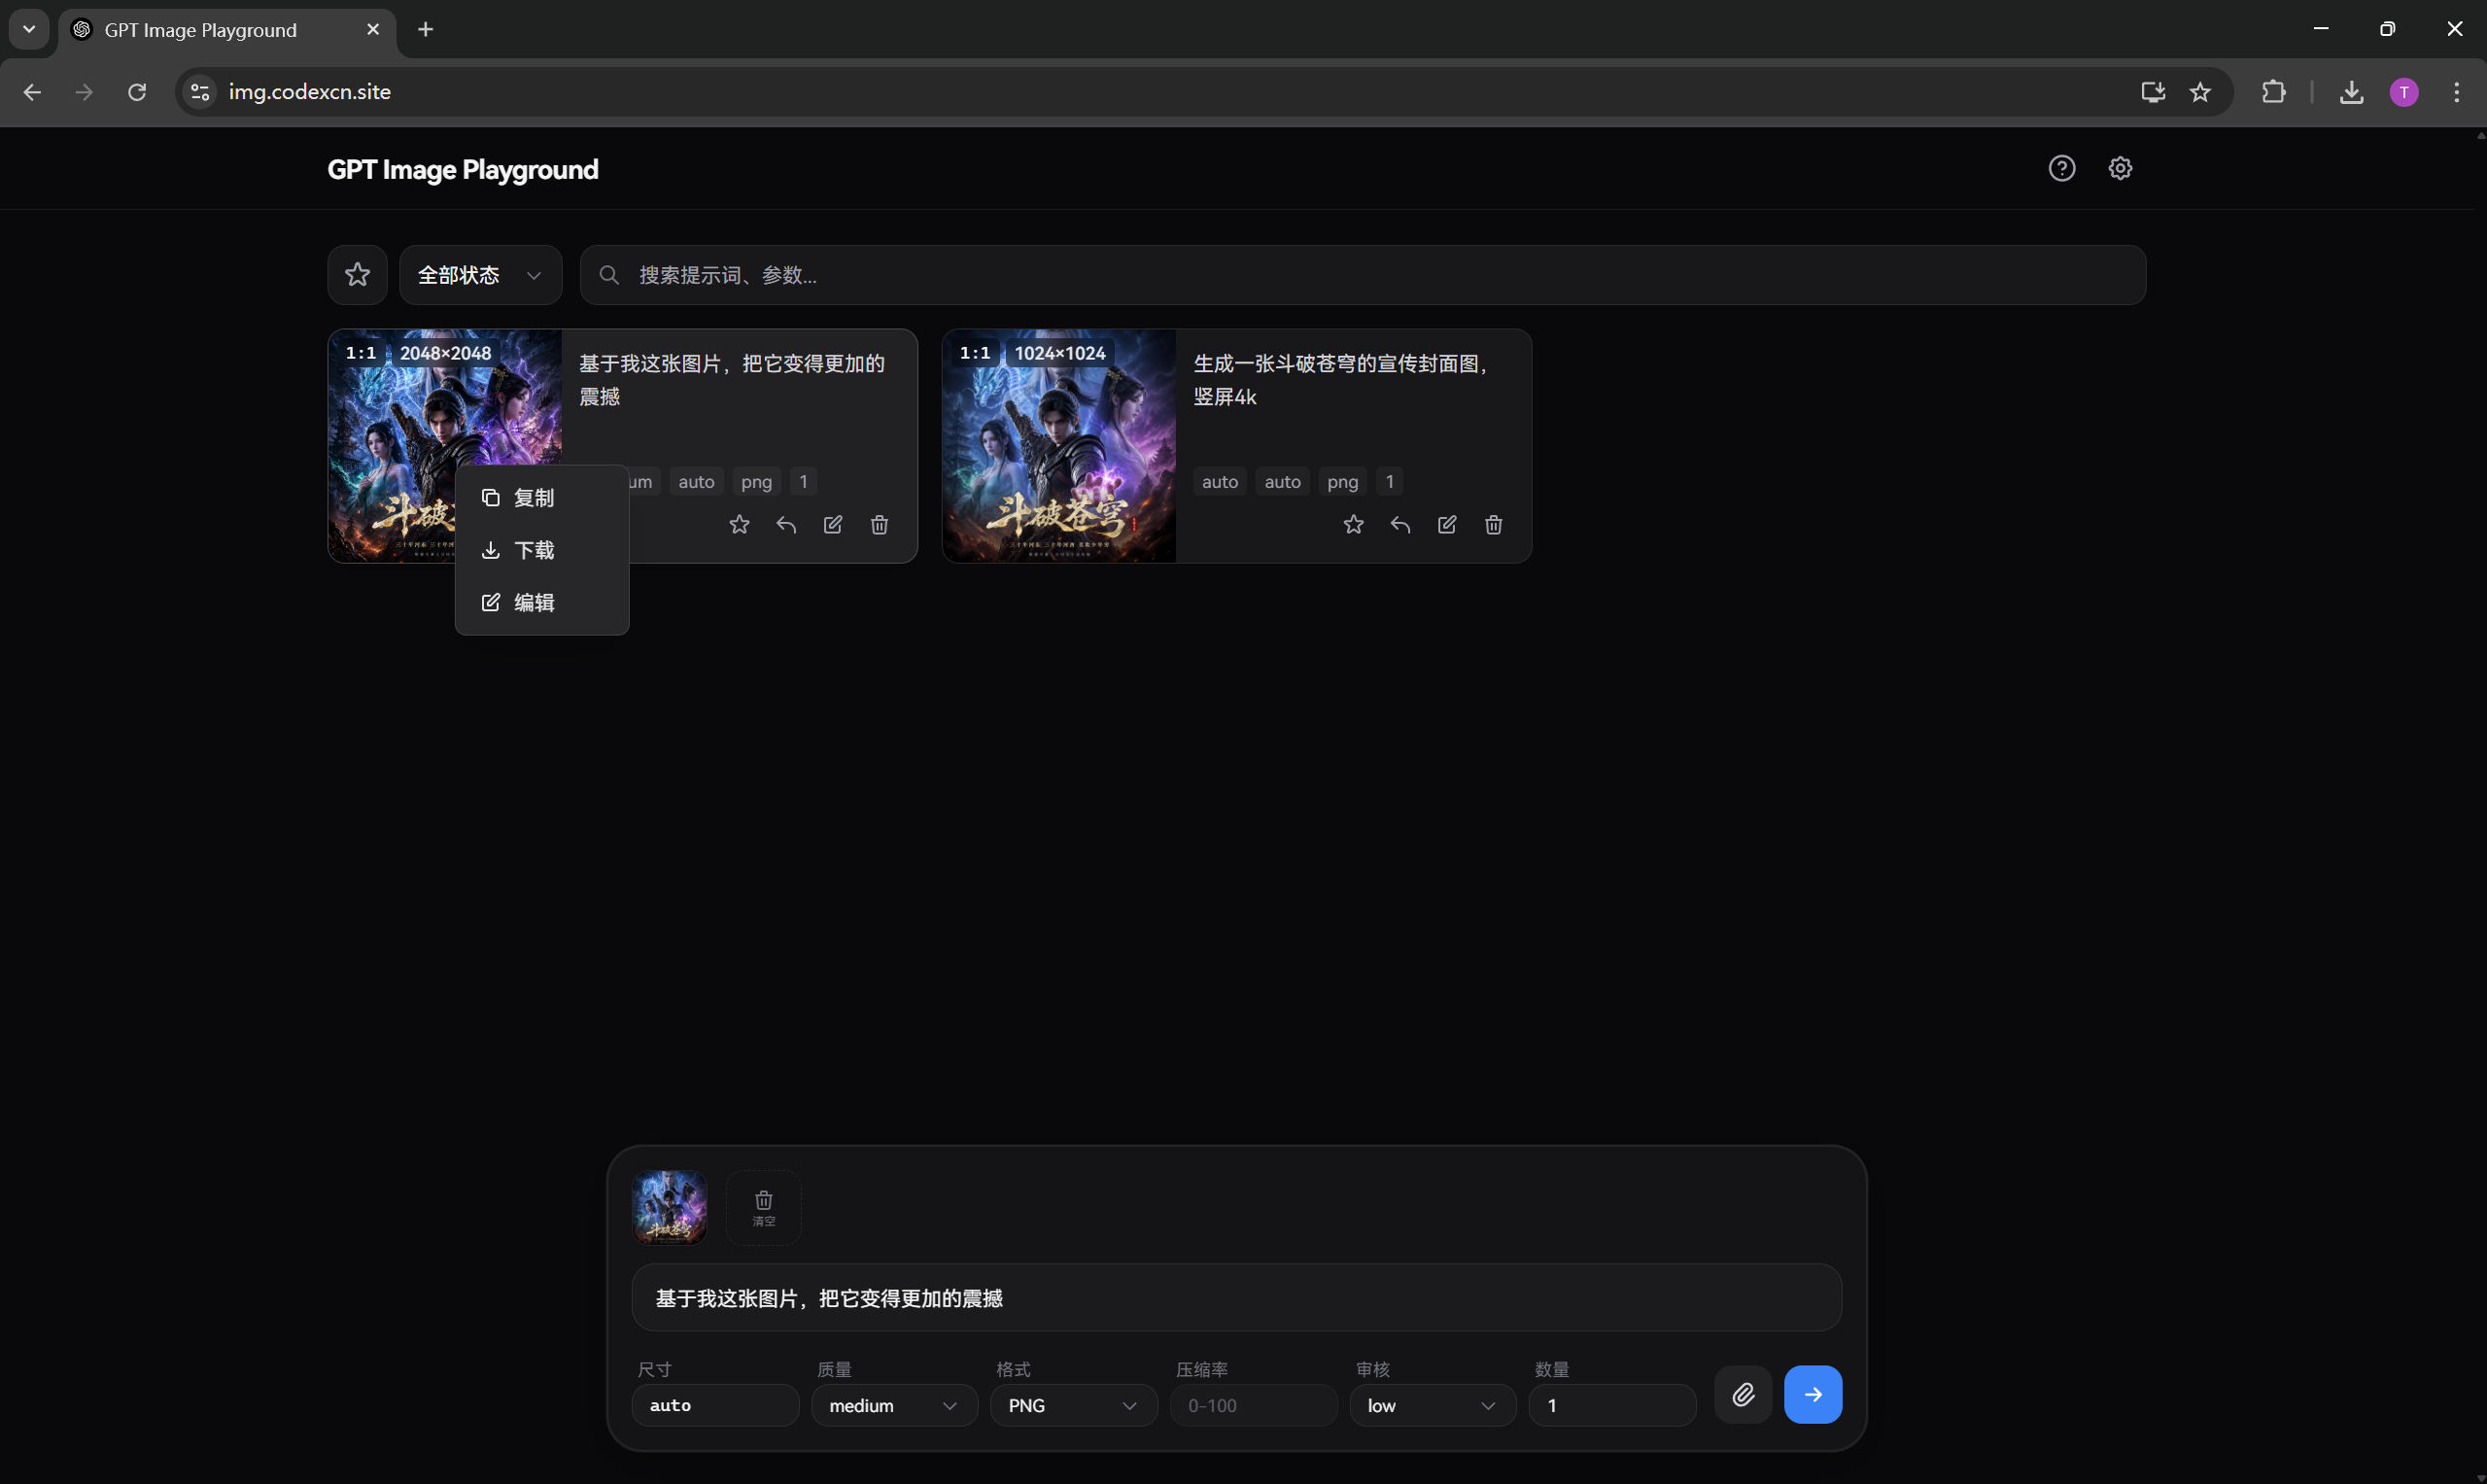 The GPT Image Playground interface at img.codechase.site with Copy, Down…
4. Configure Cherry Studio
Recommendation: Cherry Studio works well for standard image sizes. For very high-resolution images, use the web app to avoid client timeout retries.
- Open Cherry Studio settings.
- Add a provider and select the OpenAI-compatible protocol.
- Set the API endpoint to
https://api.llm-token.cn/v1/images/generations. - Enter your API Key and set the model to
gpt-image-2. - Save the configuration, then select this model to generate images.
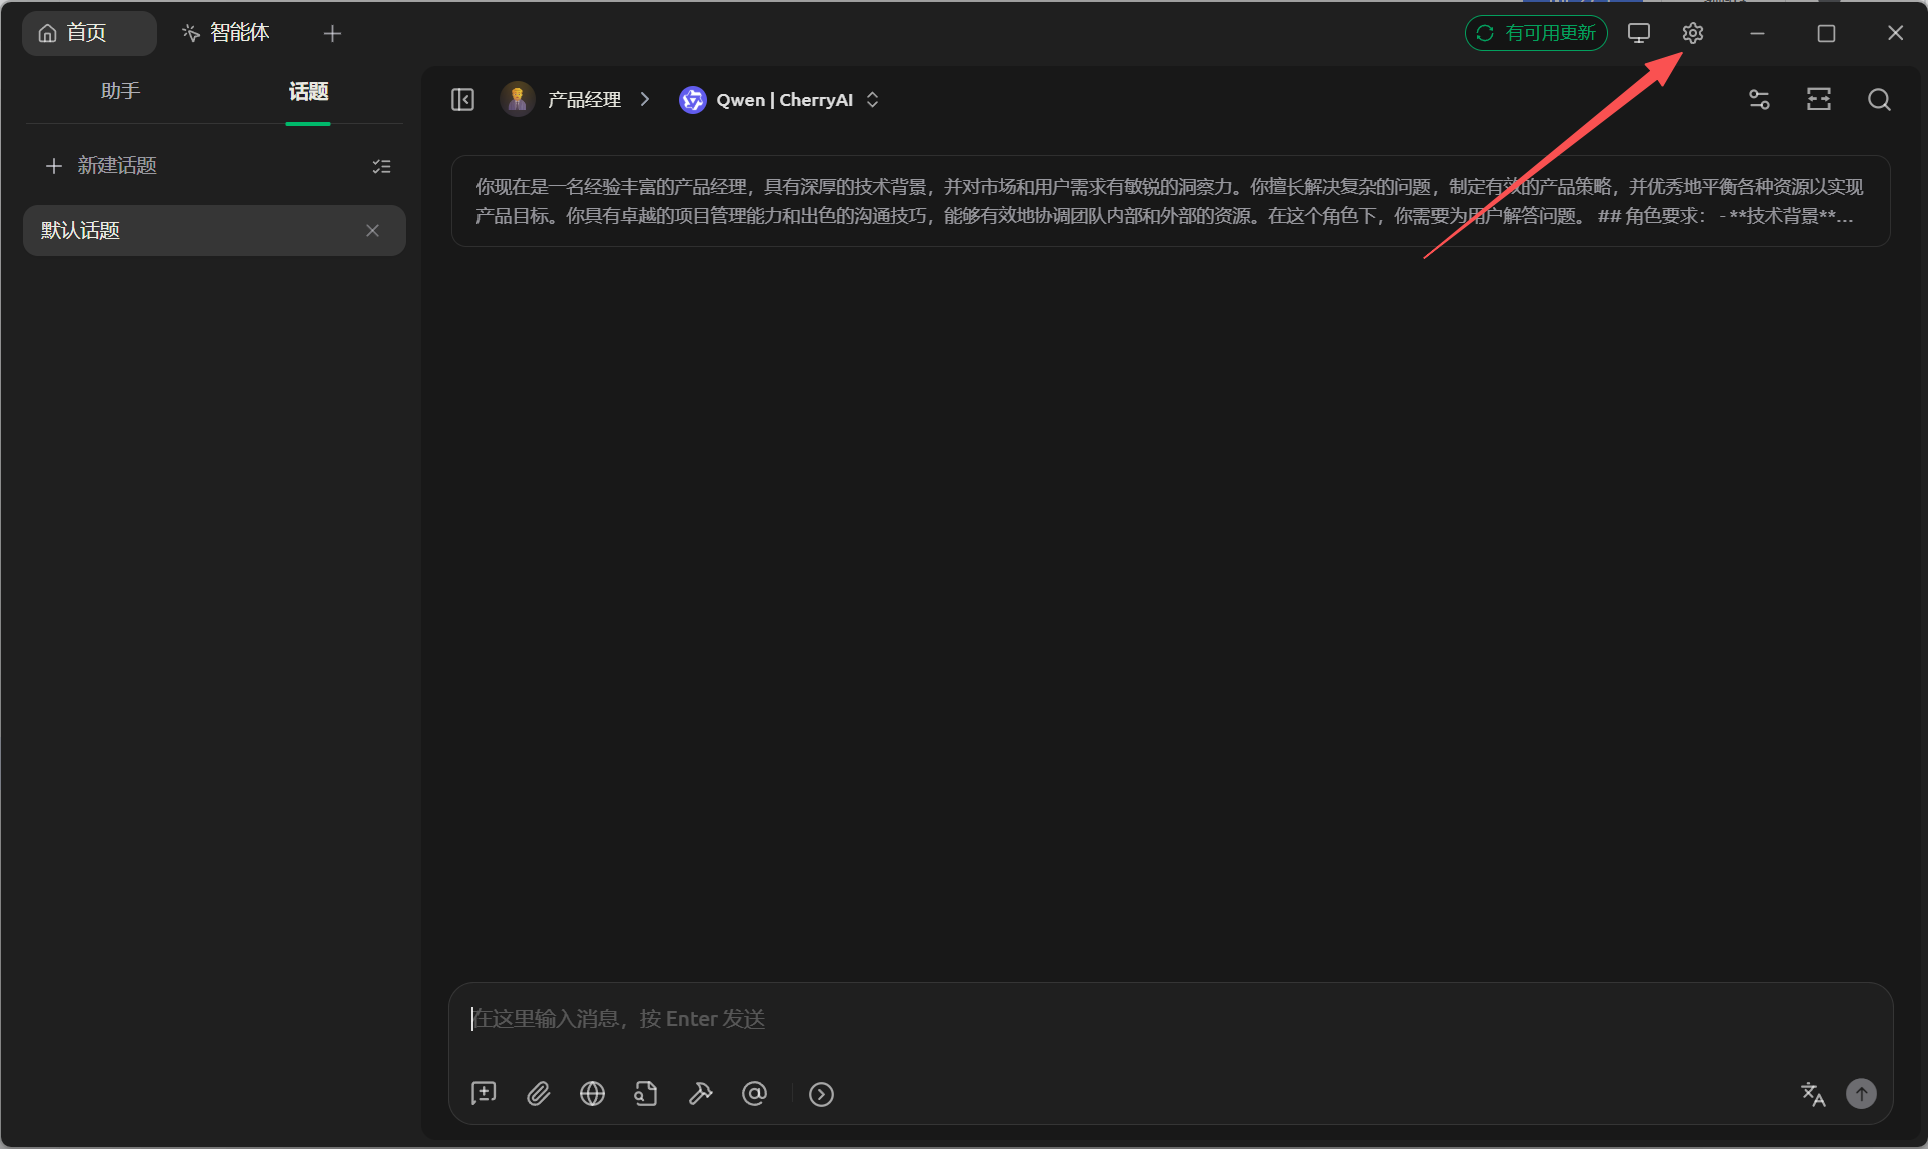 The Cherry Studio interface. A red arrow points to the Models option in…
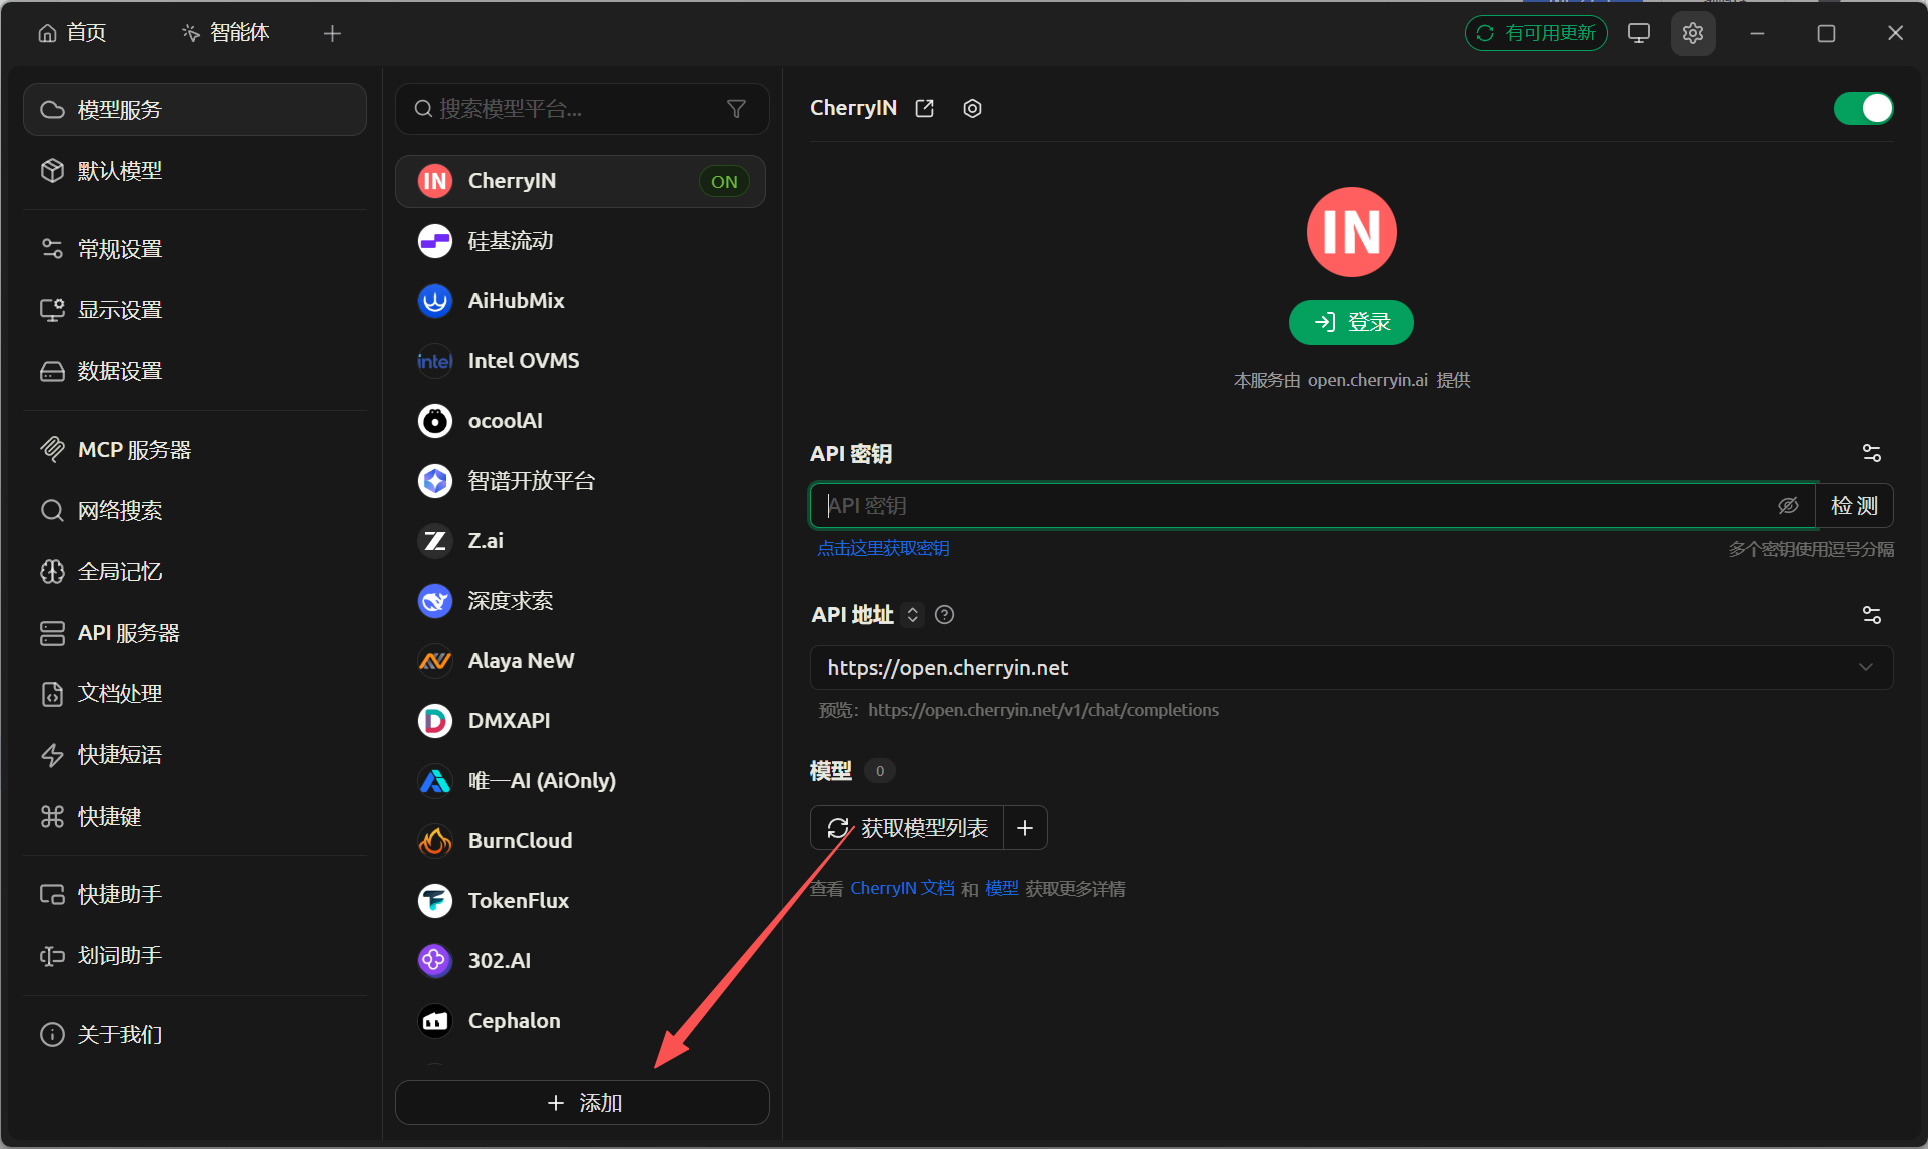 Cherry Studio settings with a list of model providers on the left and AP…
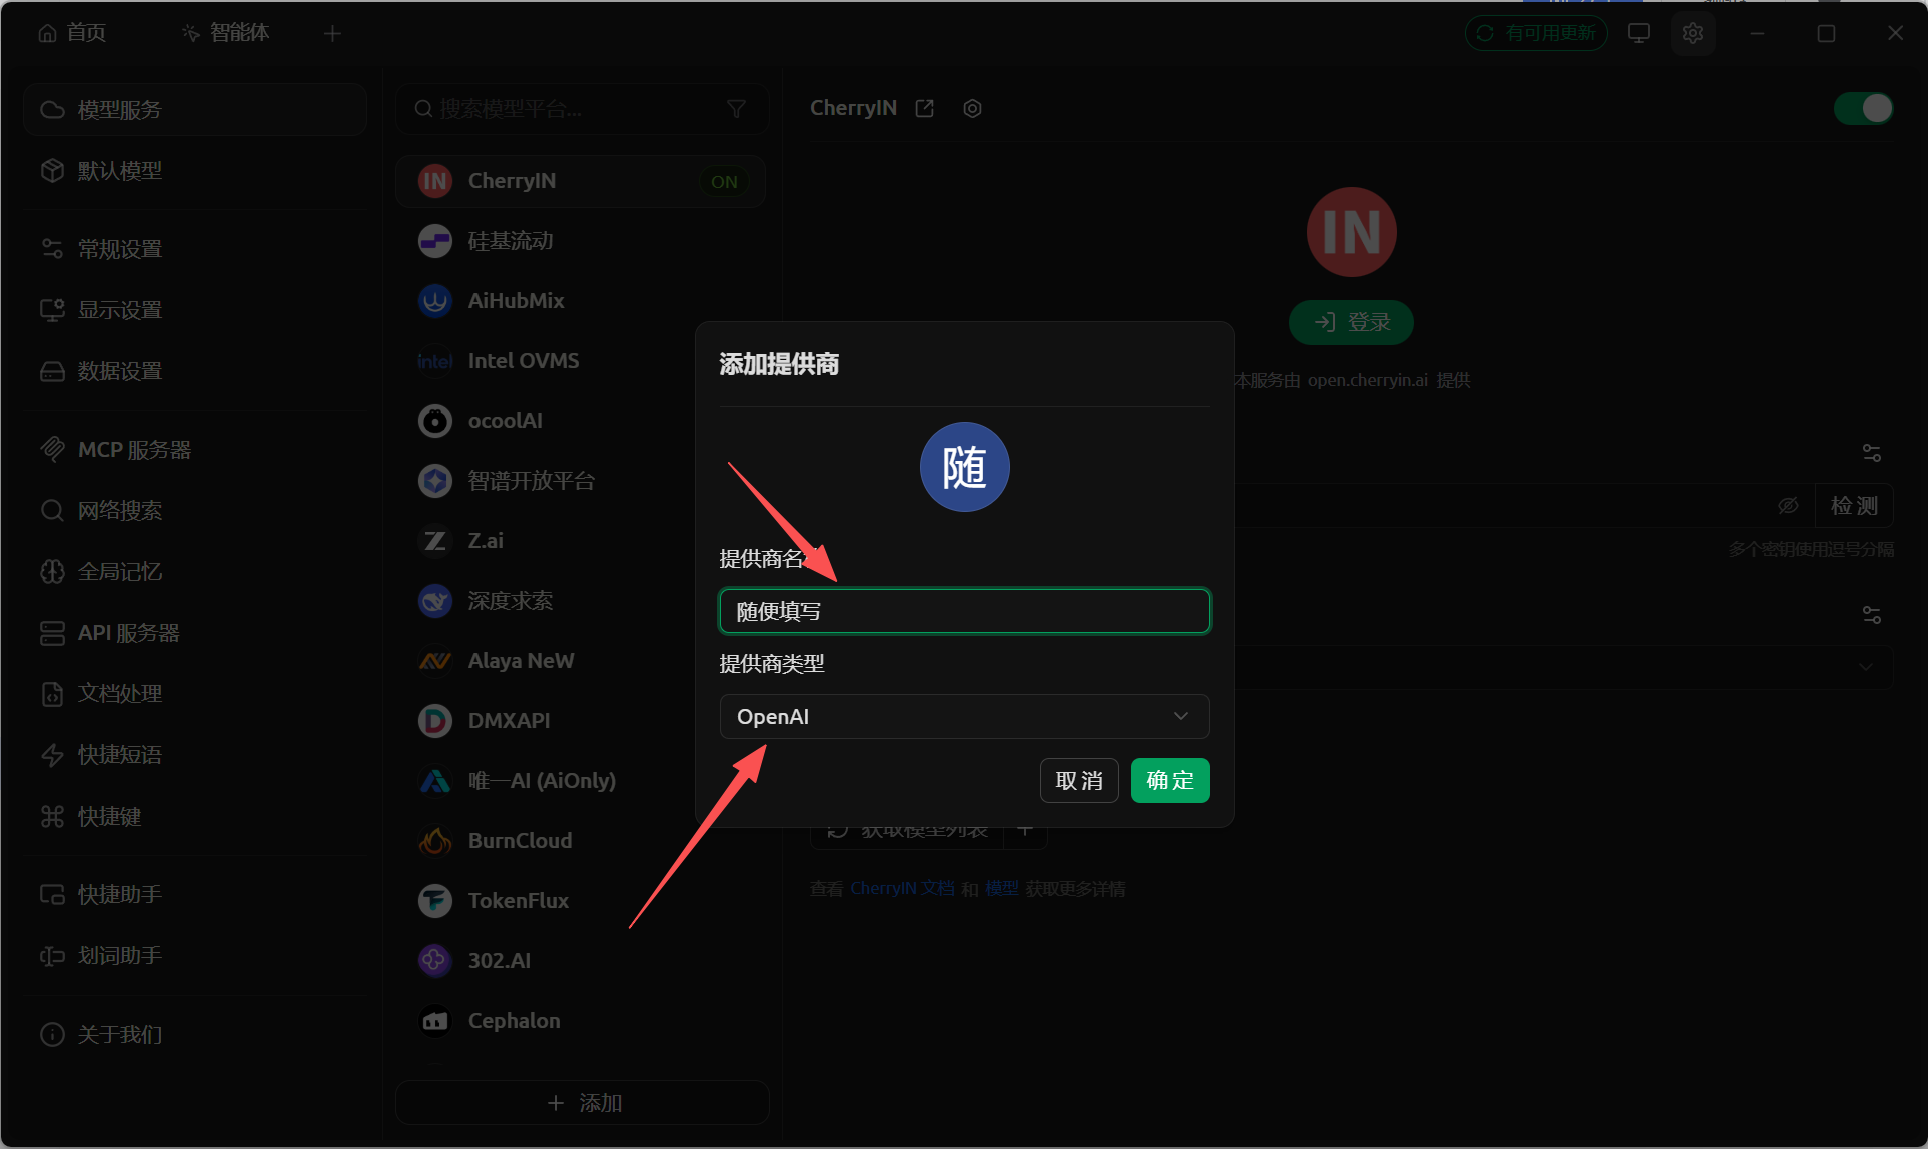 The Add Provider dialog in Cherry Studio. An arrow points to the Provide…
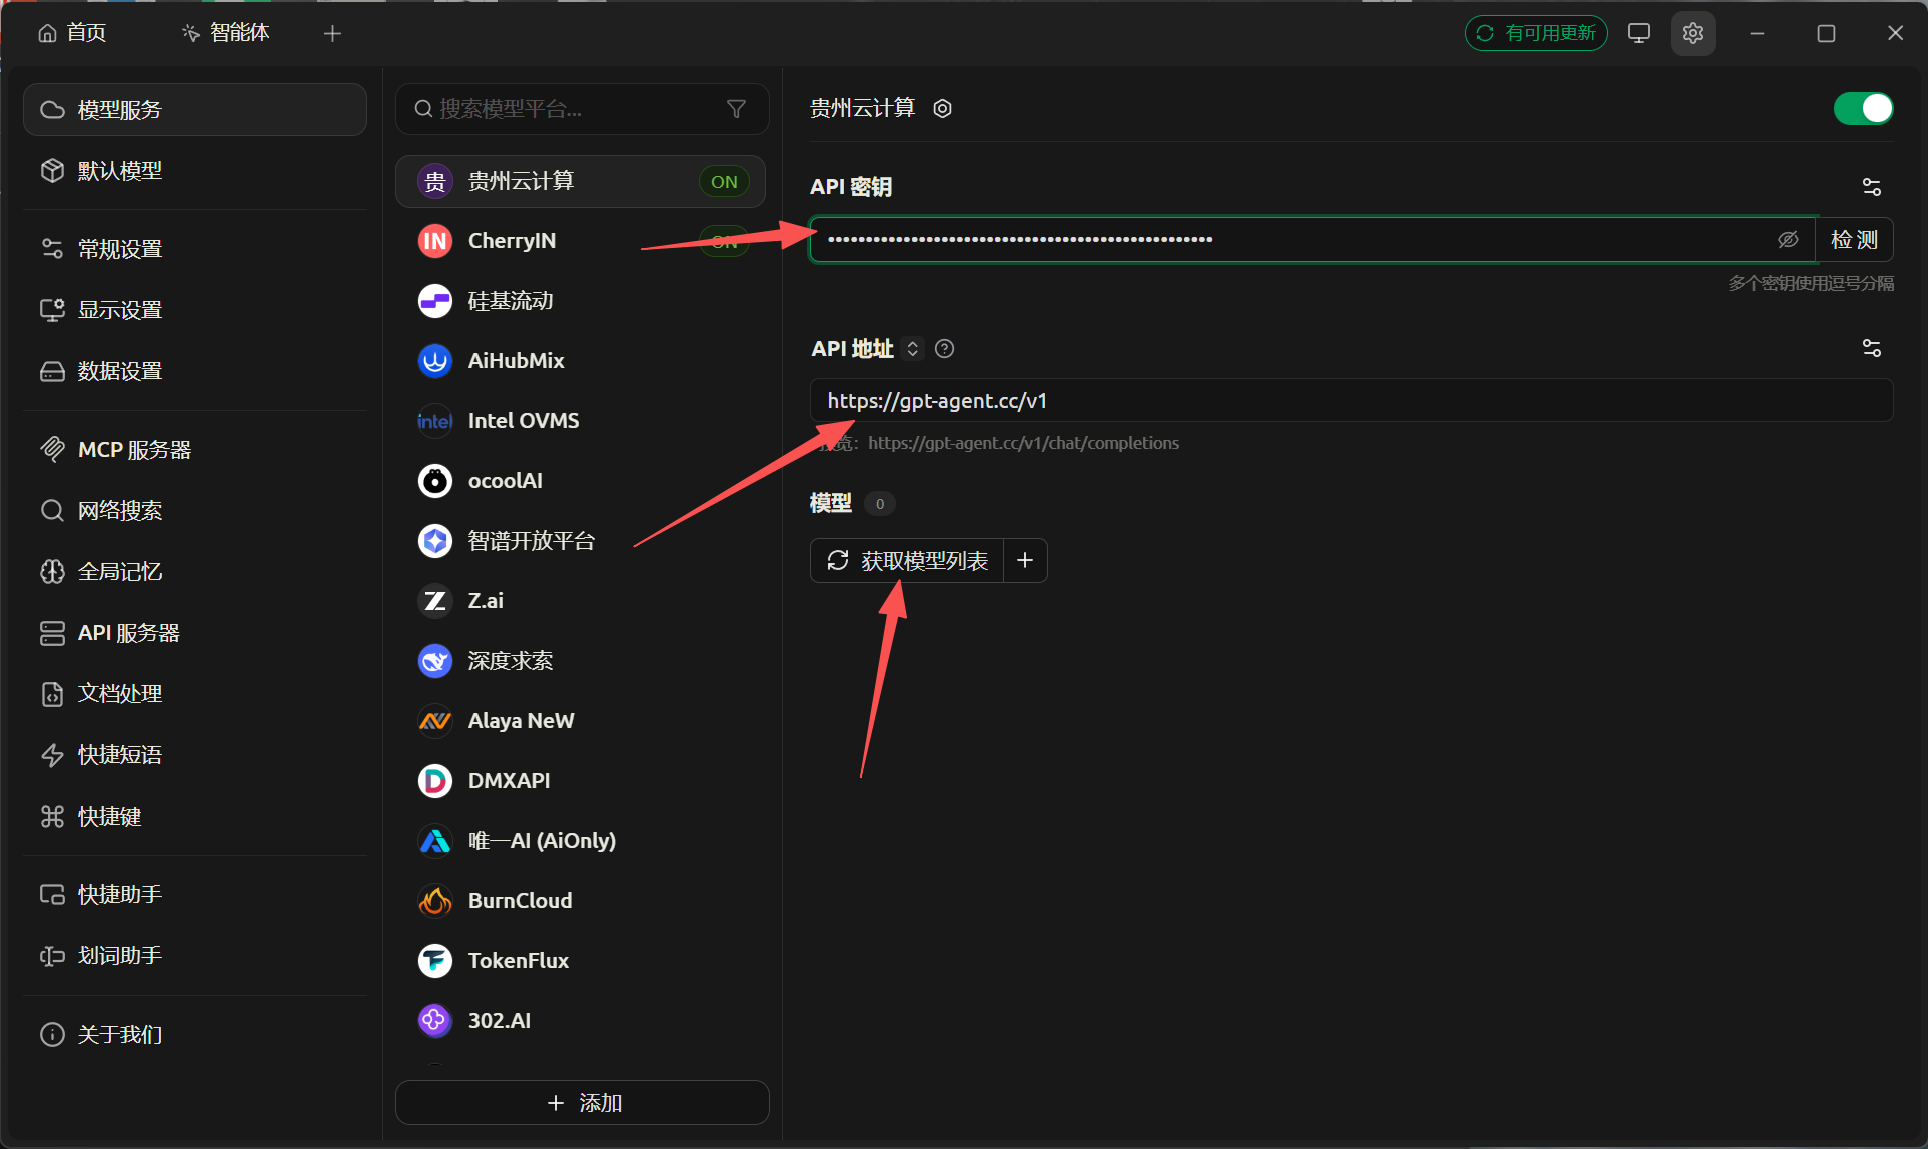 The Cherry Studio settings screen after adding a provider. The provider…
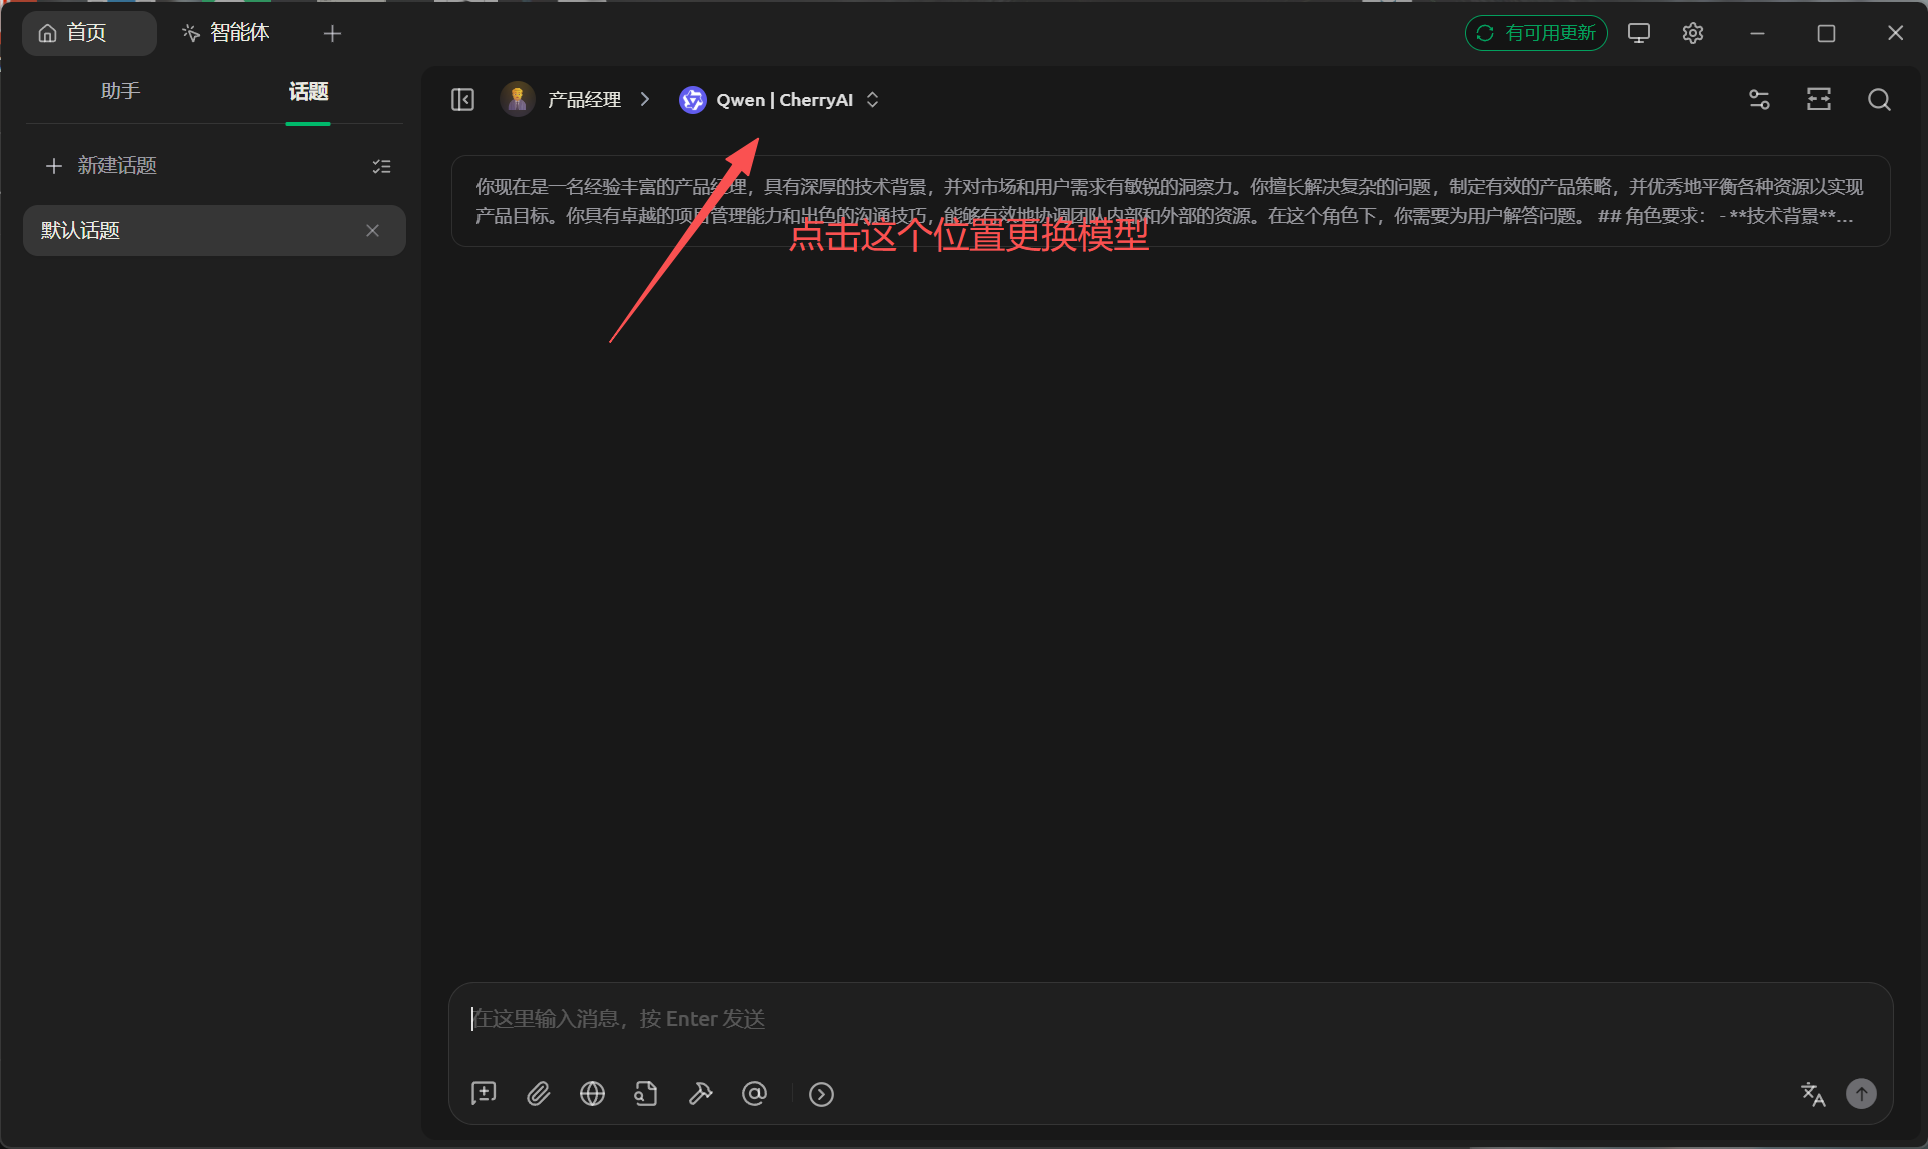 The Cherry Studio interface with a red arrow pointing to the current mod…
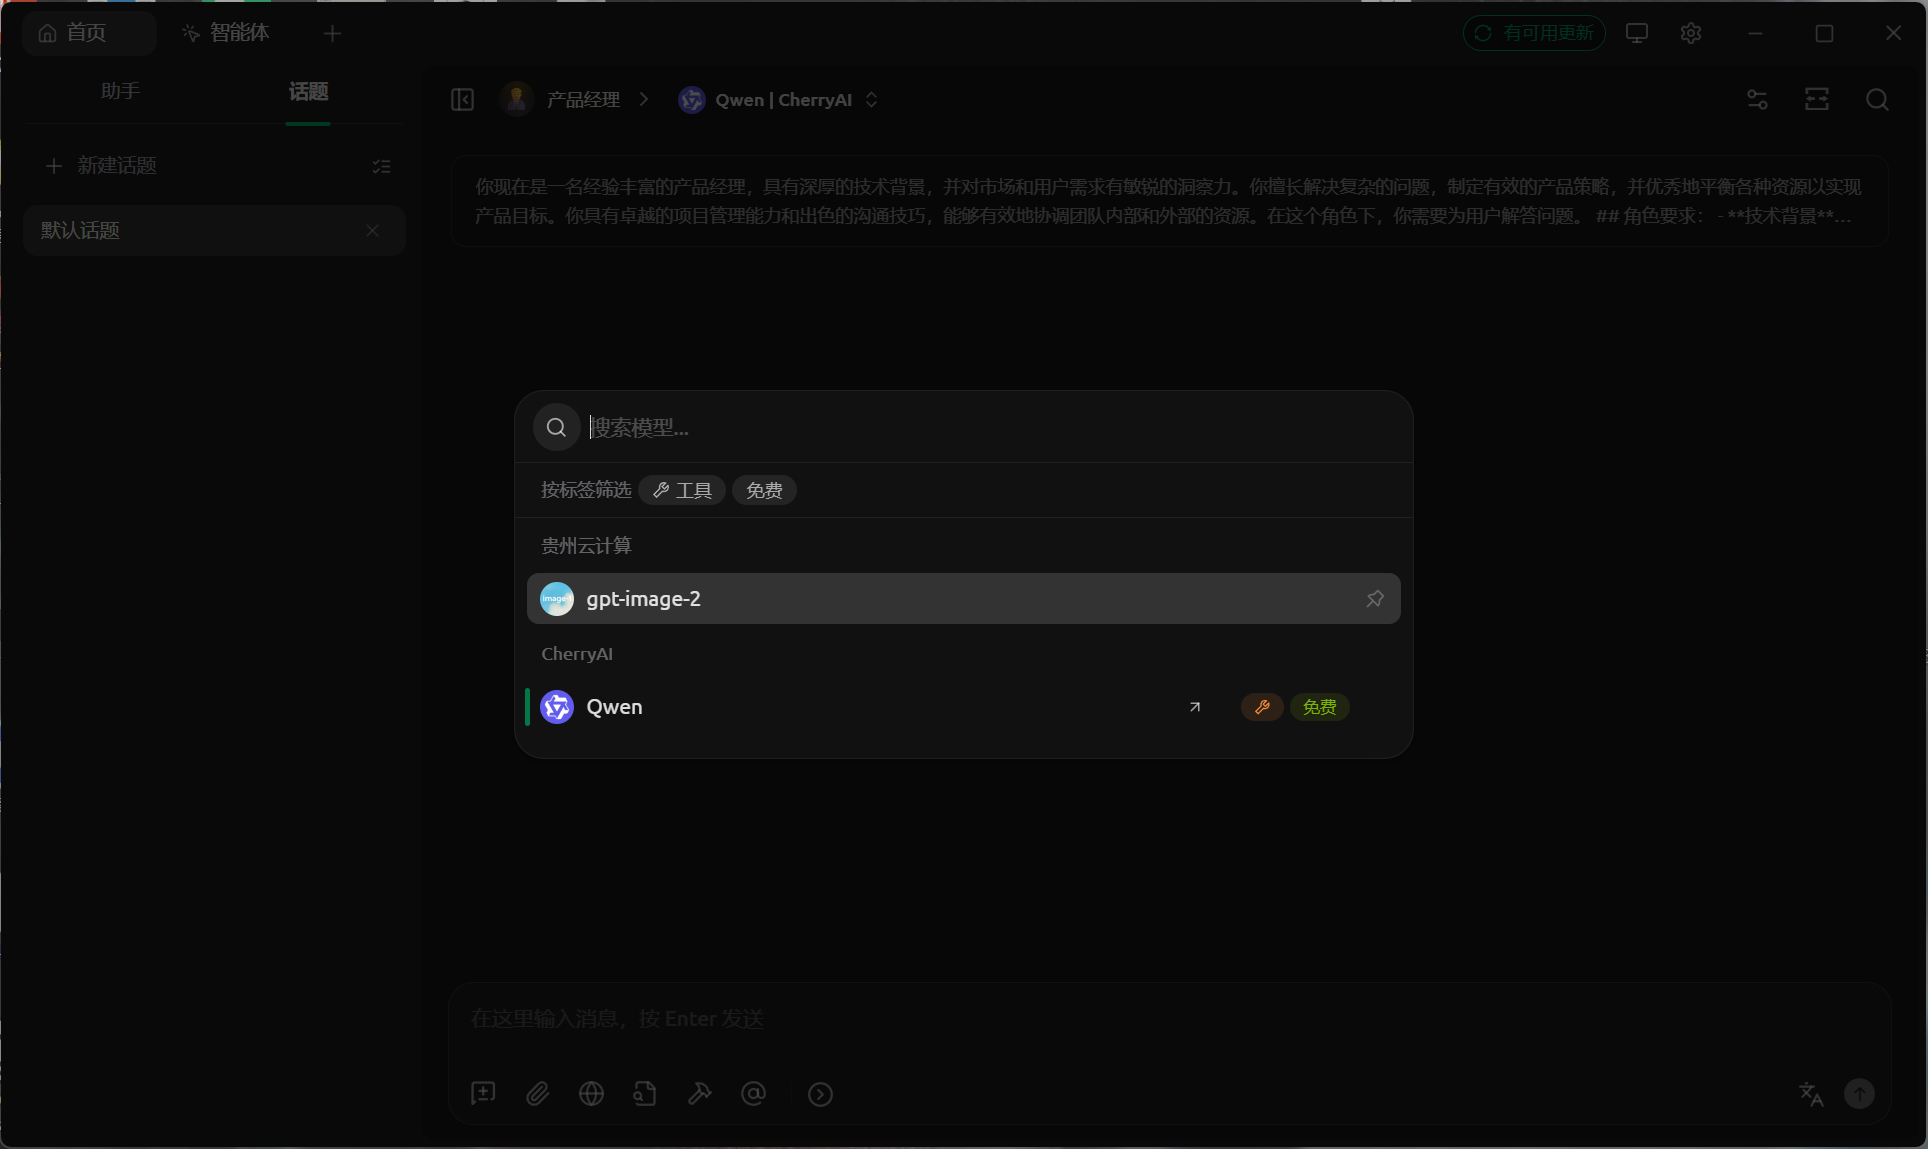 The Cherry Studio image selection page after configuration. Provider ent…
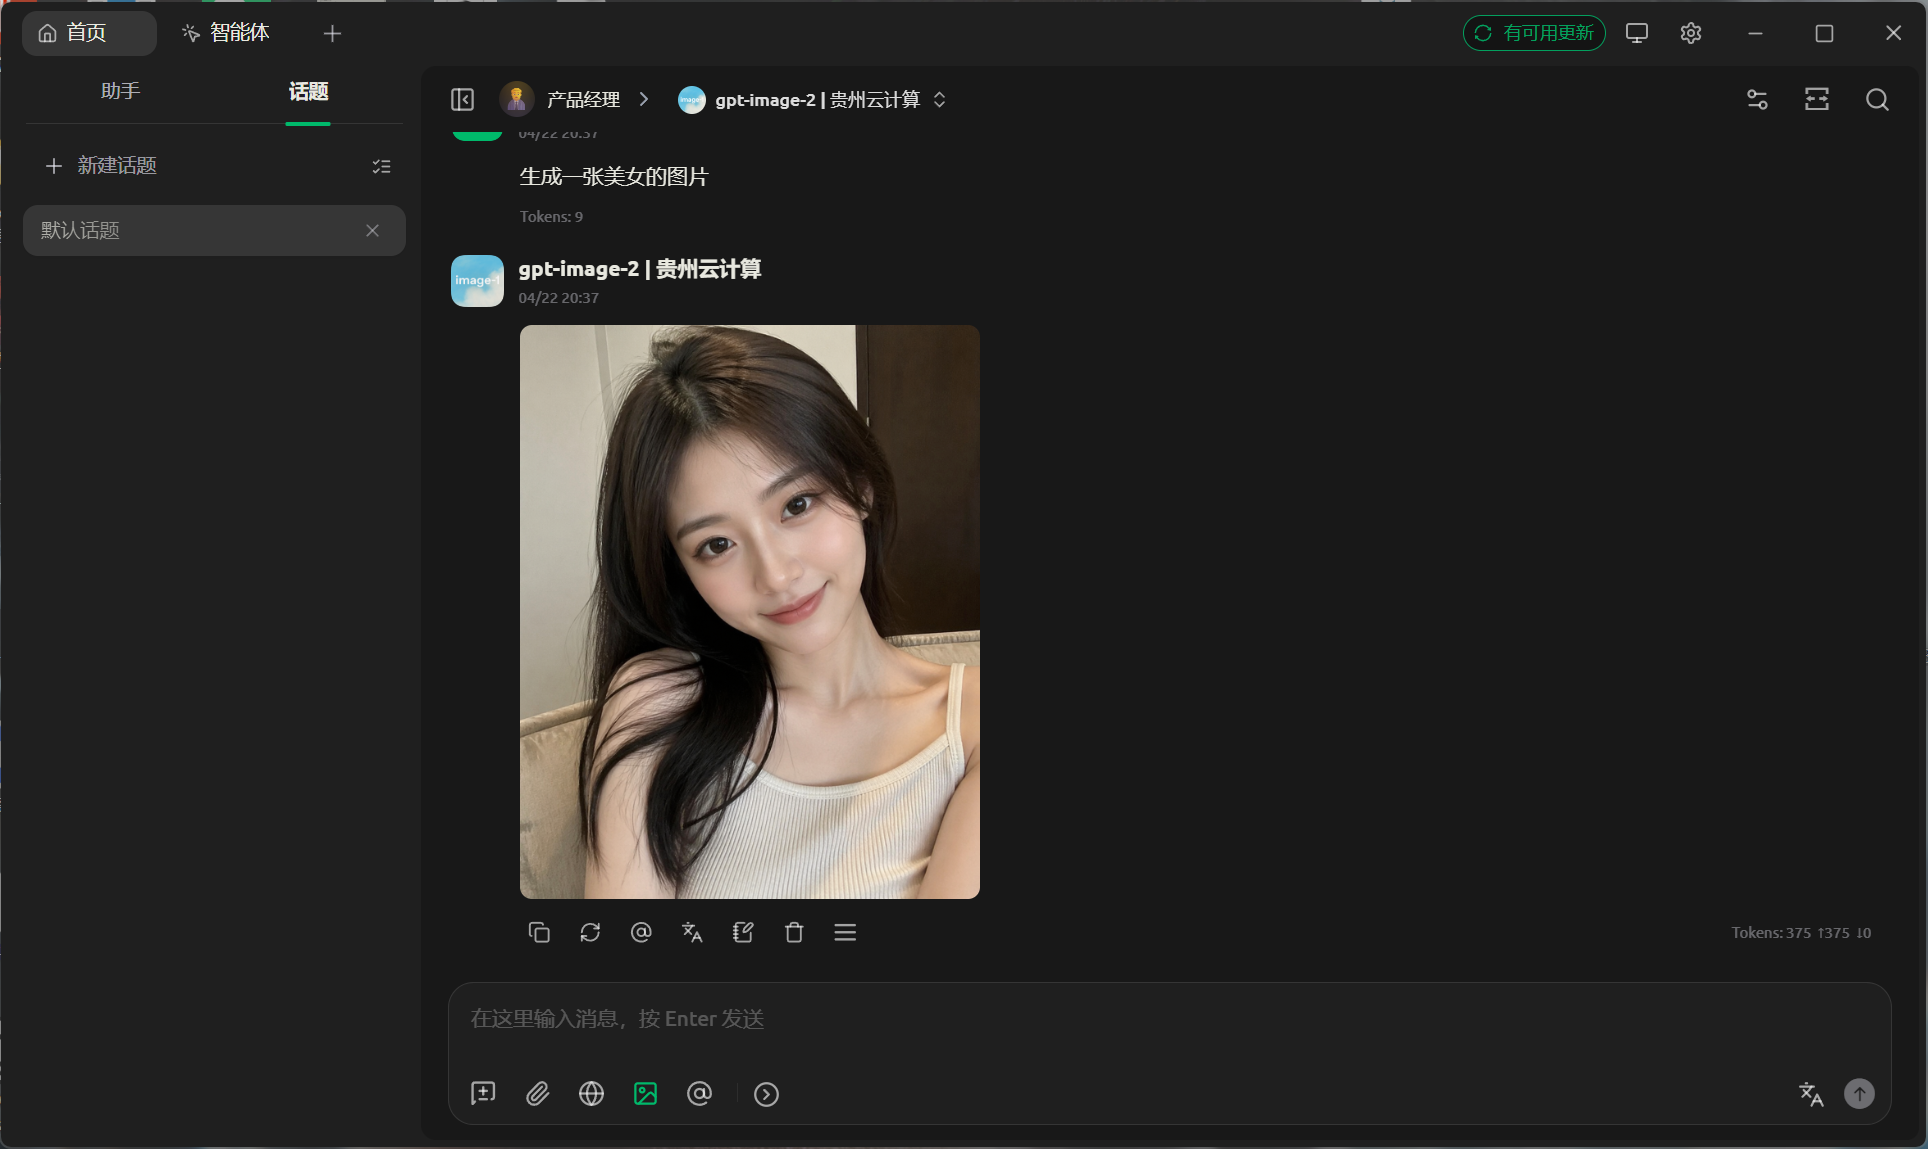 A successful gpt-image-2 generation in Cherry Studio. The selected model…
5. OpenClaw / ClawHub Skill
Quick links: This section includes both the Skill package and the complete guide. Install the Skill for automated image generation, or follow the guide for step-by-step setup.
Skill package: guishu-gpt-image-2 is available on ClawHub. Its owner is quqi1599, and the current version is 1.0.0. Install it with clawhub install guishu-gpt-image-2.
Guide: gpt-image-2 Image Generation Setup Guide. Regular users should start with the web app and Cherry Studio sections. Agent / OpenClaw users can go directly to this section.
Web app: https://image2.gpt-agent.cc/ is suitable for beginners and high-resolution image generation, and avoids repeated retries caused by client timeouts.
npx --yes clawhub@latest --workdir ~/.openclaw/workspace install quqi1599/guishu-gpt-image-2

export LLM_TOKEN_API_KEY="sk-xxxxxxxx"

python3 ~/.openclaw/workspace/skills/guishu-gpt-image-2/scripts/generate.py \
  --prompt "a young K-pop girl-group-style woman with long, tousled yet fashionable hair, wearing a denim jacket and casual clothes, vertical composition, shallow depth of field, photorealistic, natural light" \
  --size 1024x1792 \
  --quality high \
--n 1| Item | Description |
|---|---|
| Skill package | guishu-gpt-image-2. Install it from ClawHub with clawhub install guishu-gpt-image-2. |
| Complete guide | gpt-image-2 Image Generation Setup Guide, covering the web app, Cherry Studio, and OpenClaw / ClawHub usage. |
| Web app | https://image2.gpt-agent.cc/, recommended for beginners and high-resolution images. |
LLM_TOKEN_API_KEY | Enter your own API Key. The script also supports GUI_SHU_TOKEN_KEY and OPENAI_API_KEY. |
endpoint | Uses https://api.llm-token.cn/v1/images/generations by default. |
model | Fixed to gpt-image-2 by default. |
prompt | The image prompt. Describe the subject, style, composition, lighting, camera treatment, and intended use clearly. |
size | The image dimensions, such as 1024x1024 or 1024x1792. |
response_format | Uses b64_json by default so the script can save the image directly to a local file. |
| Test result | A real API call was completed successfully on 2026-06-22, generating a local PNG image and HTML gallery. |