WorkBuddy Setup Guide
Connect a custom model with the three essentials: Base URL, API Key, and model ID.
Core idea: Configuring a custom model in WorkBuddy comes down to entering three values correctly: Base URL, API Key, and model ID. When these three values are correct, most clients can connect successfully.
| Setting | Recommended value | Notes |
|---|---|---|
| Provider type | Custom model / OpenAI Compatible | Labels vary by version. Choose the option that supports a custom OpenAI-compatible API. |
| Base URL | https://api.llm-token.cn/v1 | Start with the address that includes /v1. If your version reports an error, try https://api.llm-token.cn. |
| API Key | sk-xxxxxxxx | Copy the complete Key without spaces. |
| Model ID | Copy the full name from the model list | For example, claude-sonnet-4-6, gpt-5.5, or MiniMax-M3. |
1. Download and Install WorkBuddy
- Open the official website and download the client for your operating system.
- Install and open WorkBuddy, then sign in with any supported account.
- Go to the home screen and prepare to add a custom model.
2. Open the Model Settings
On the home screen, select the model or settings entry to open the model configuration page.
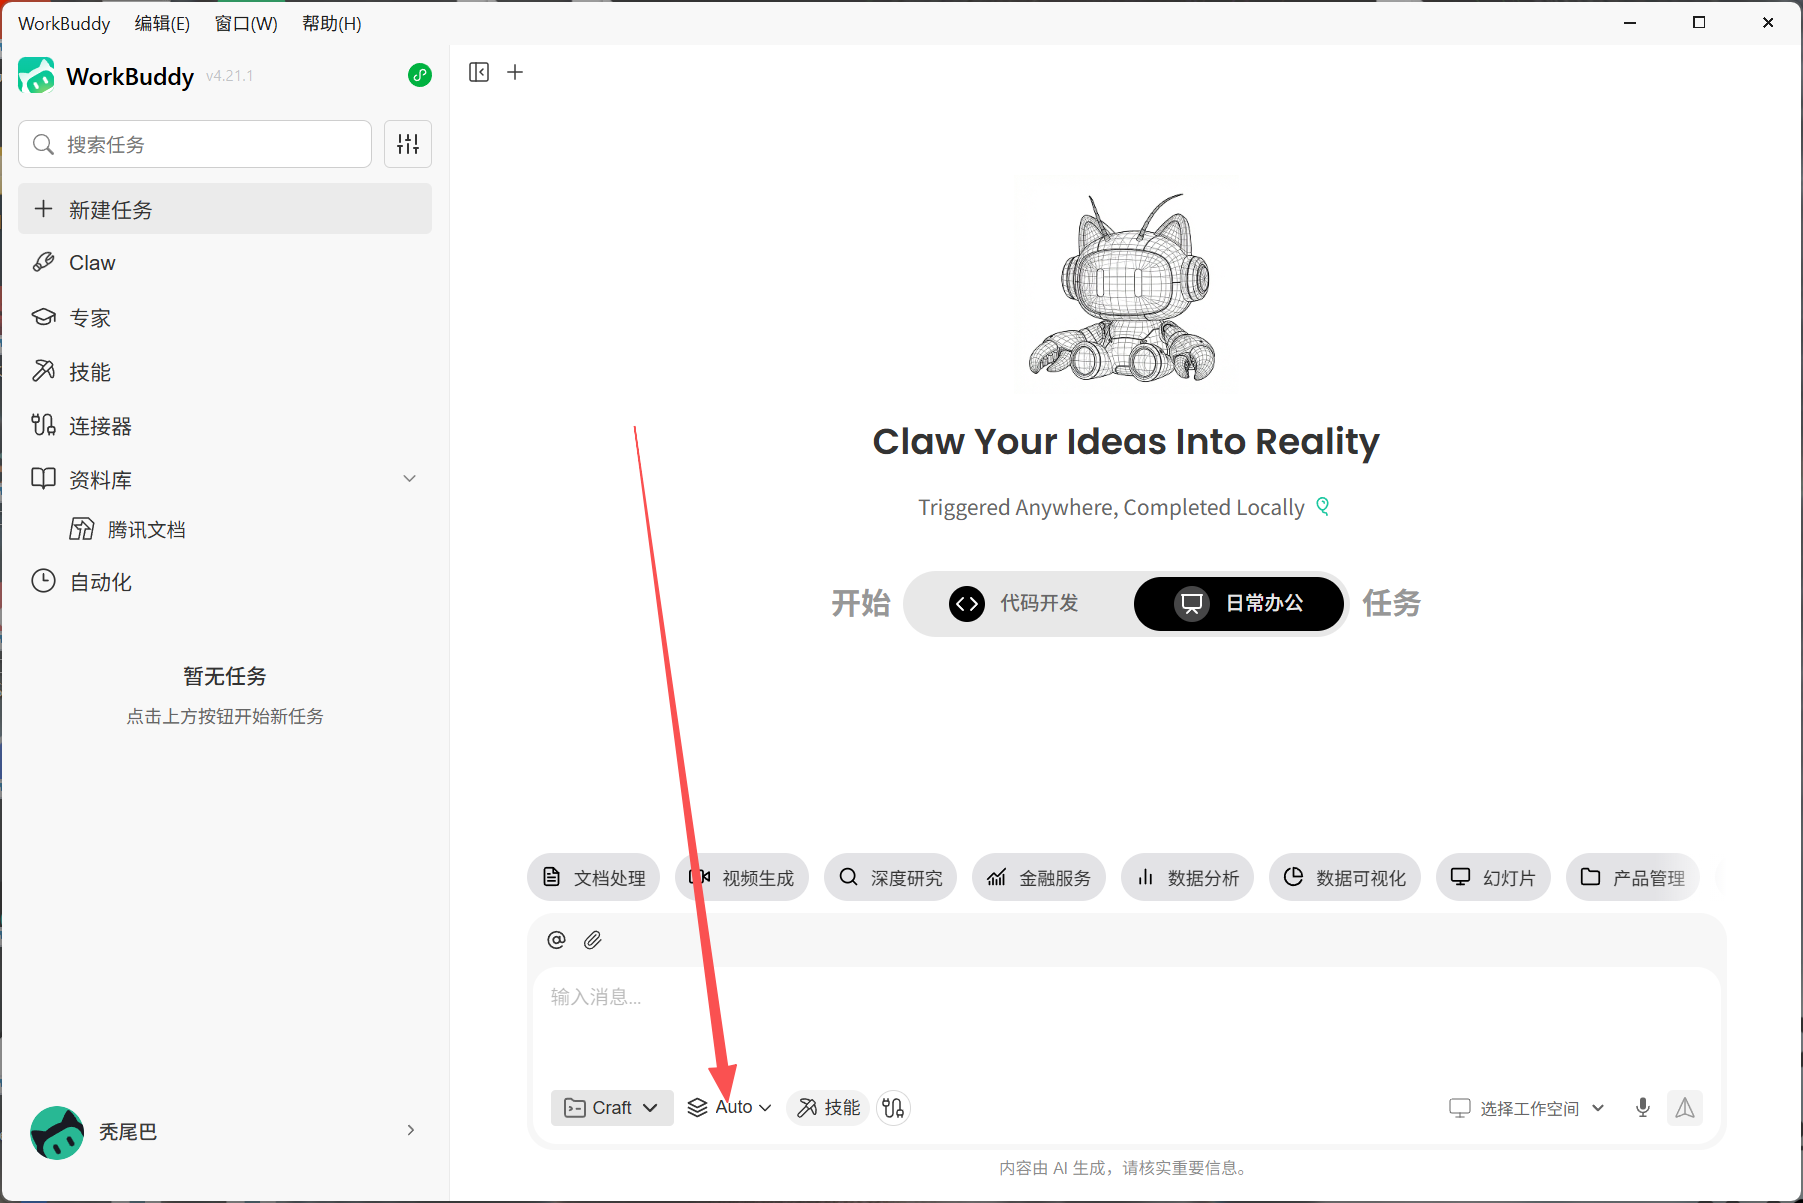 WorkBuddy interface with navigation for models, experts, skills, connect…
3. Choose a Custom Model
Open the custom-model option. Any entry that lets you provide a Base URL, API Key, and model ID can connect to the LLM API Gateway.
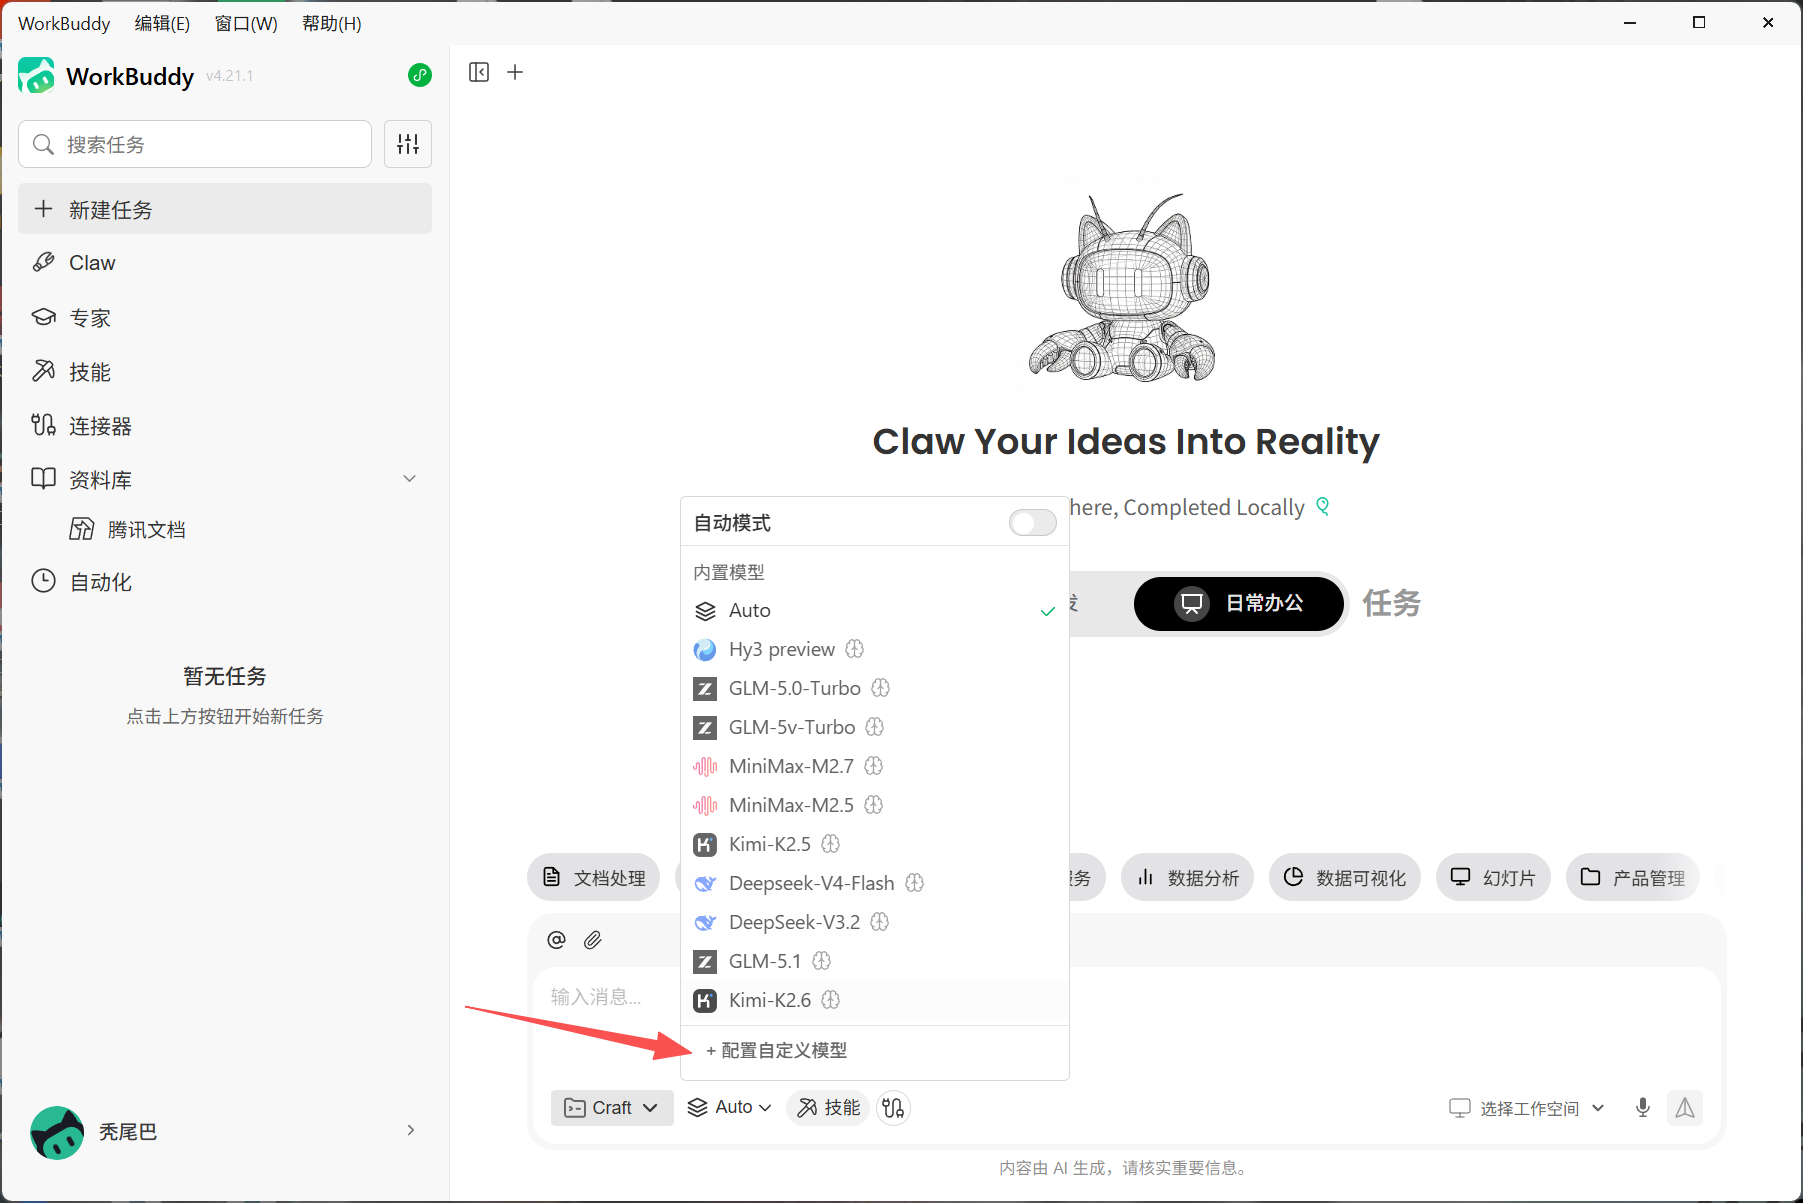 WorkBuddy model configuration page with the Configure custom model butto…
4. Enter the API Details
- Base URL:
https://api.llm-token.cn/v1 - API Key: Paste your complete Key.
- Model ID: Copy the complete model name from the model list.
- Save the configuration, return to the home screen, and select the newly configured model to start a conversation.
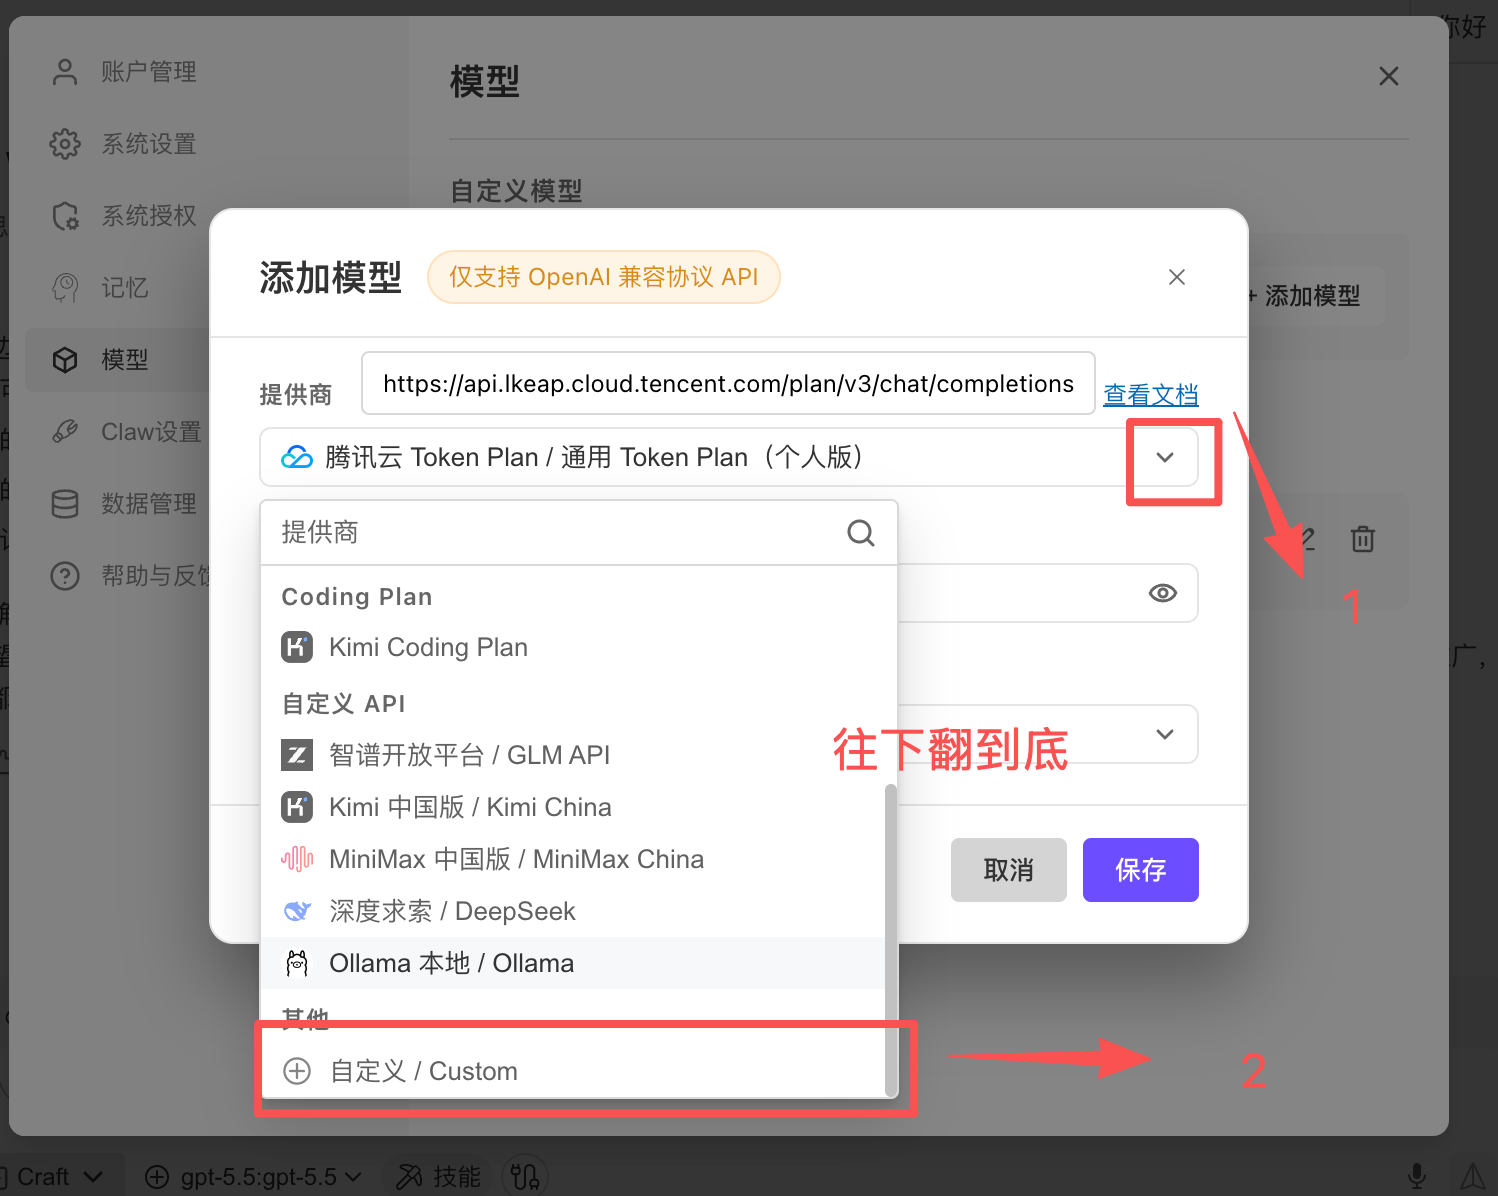 WorkBuddy Add model dialog stating that only OpenAI-compatible APIs are…
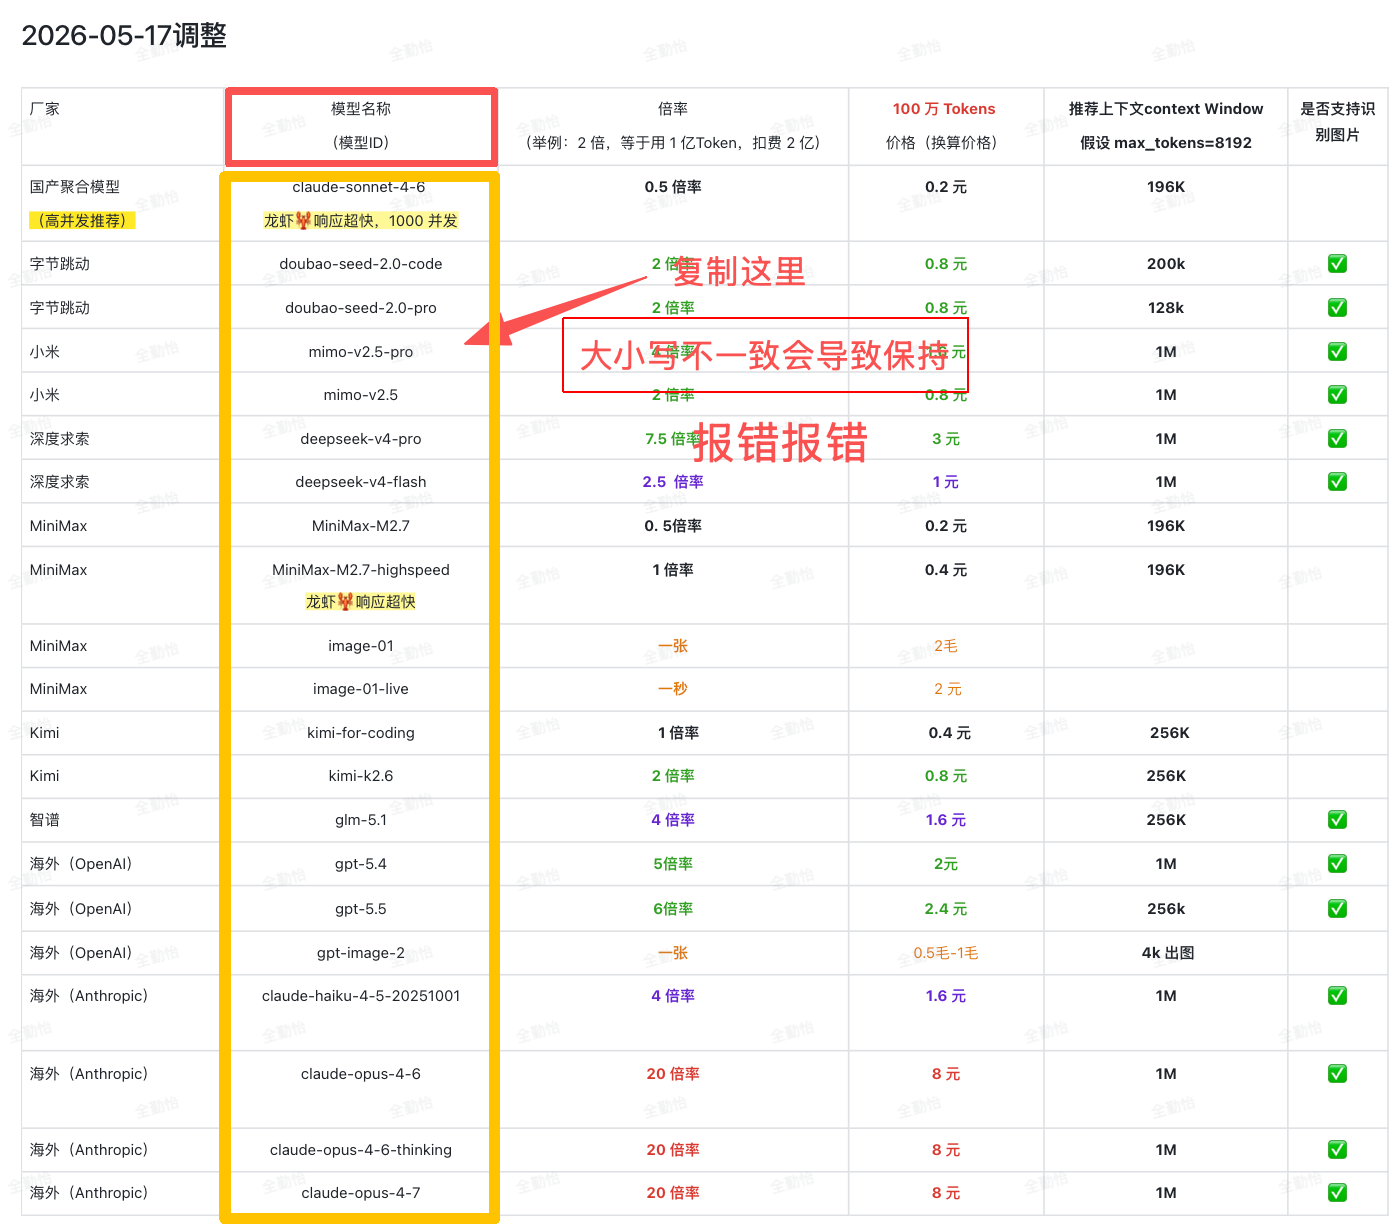 LLM API Gateway model list dated May 17, 2026, with code-cornell-4.6 hig…
Important: The model ID must match the model list exactly. Do not change capitalization, remove the version number, or copy the Chinese description with it.
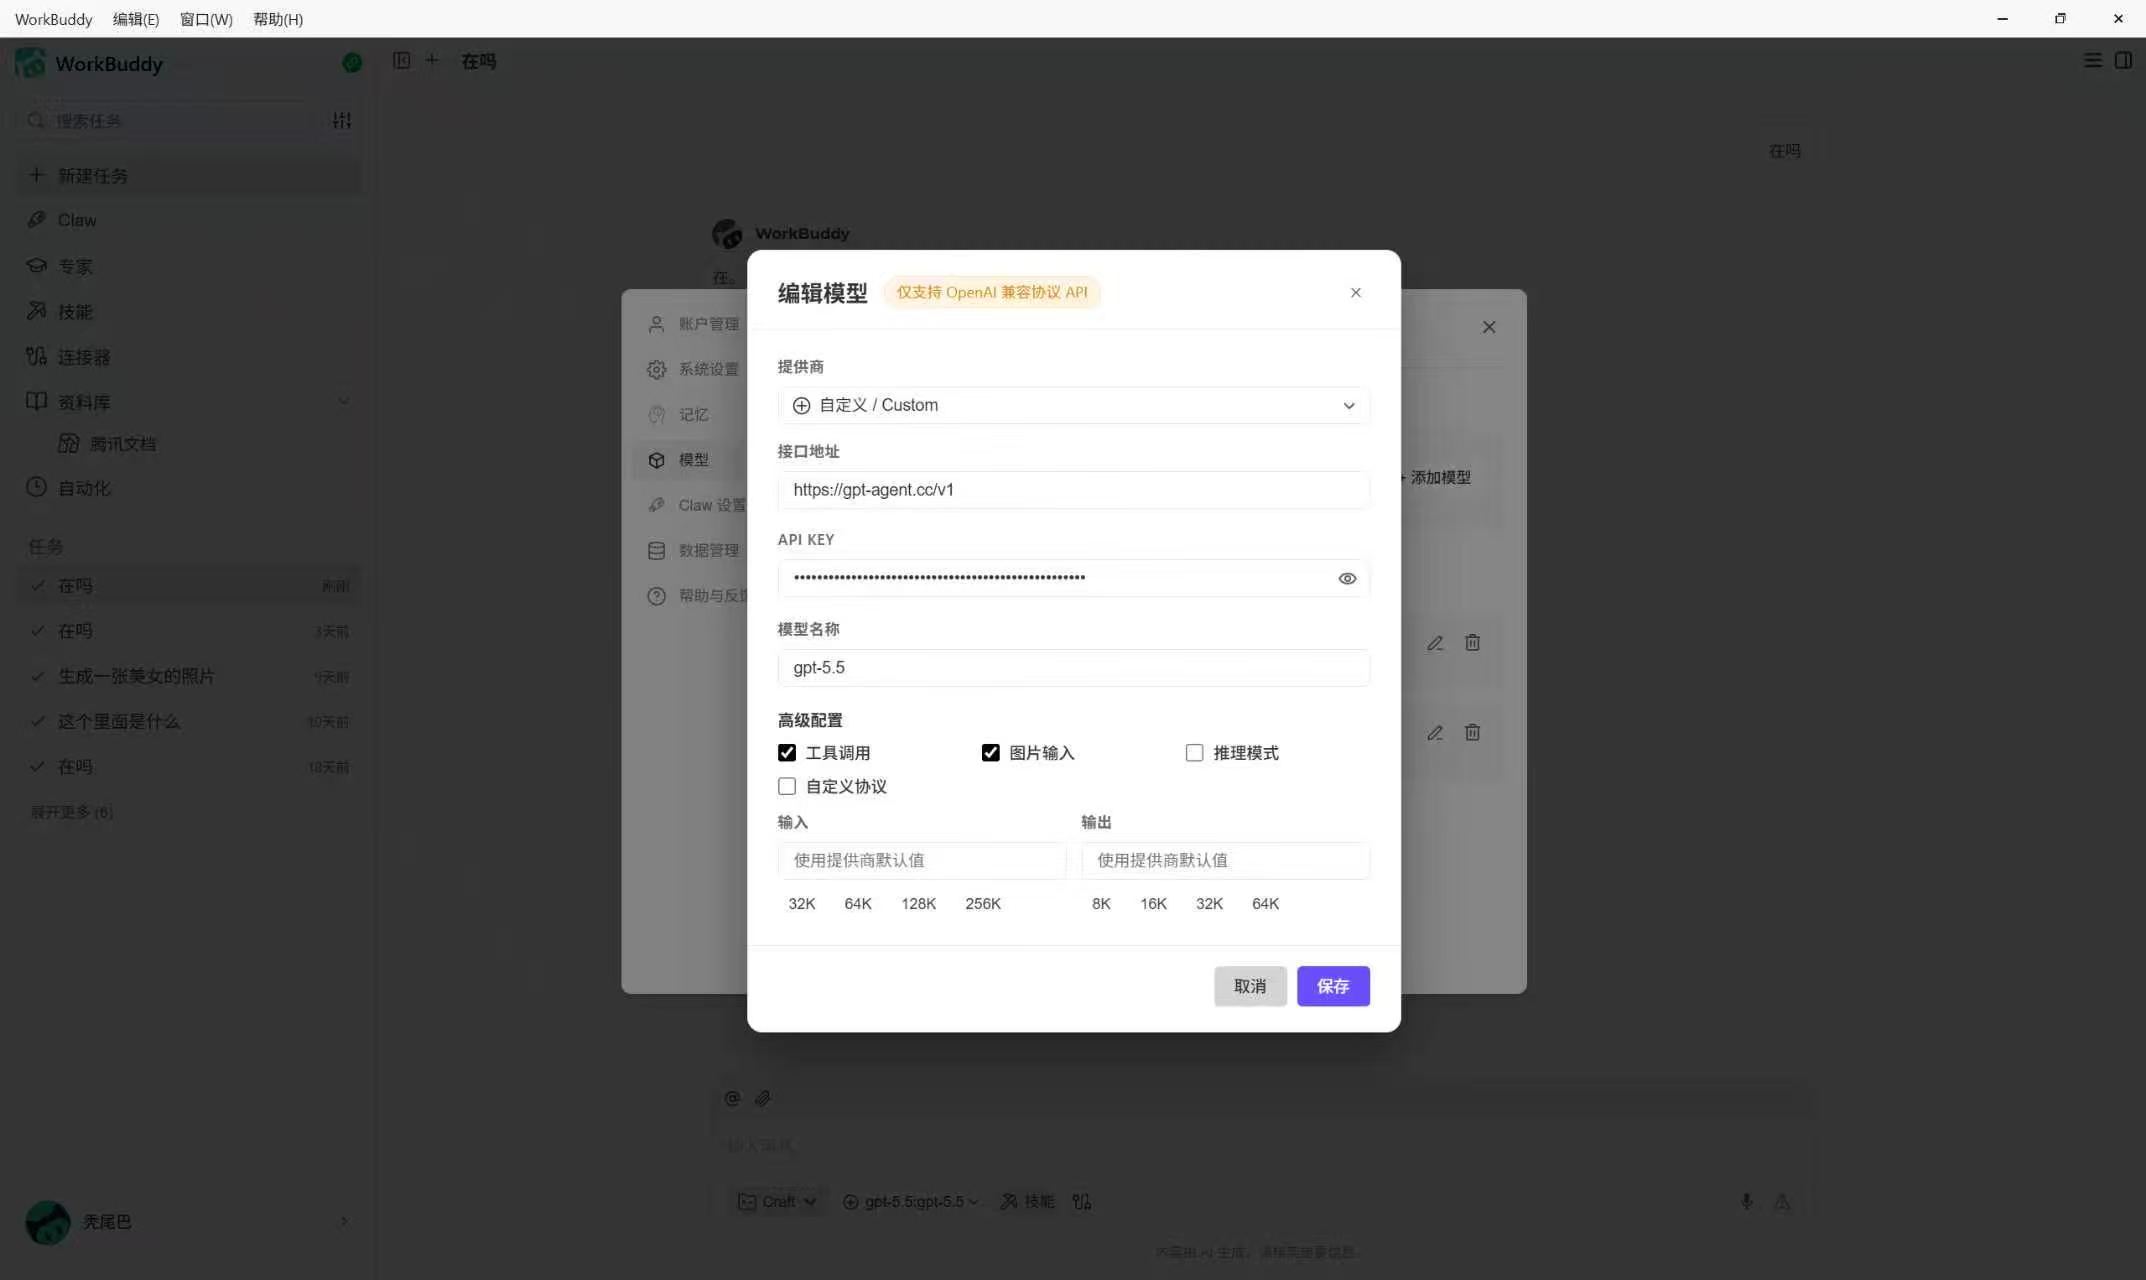 WorkBuddy model creation screen showing the model name Mistral (Lora - 7…
5. Verify the Configuration
- Return to the WorkBuddy home screen.
- Select the custom model you just configured.
- Send this test message:
Hello, reply with one sentence. - If the model responds normally, the setup is complete.
6. Troubleshooting
| Issue | Resolution |
|---|---|
| Cannot connect | Check the Base URL first. Try https://api.llm-token.cn/v1, then https://api.llm-token.cn if needed. |
| Model unavailable | Confirm that the model ID exactly matches the model list. |
| Invalid Key | Confirm that the Key is complete, has no extra spaces, and was not entered in the model-name field. |
| Corporate or campus network fails | Test with a phone hotspot, then check the local proxy, environment variables, and regional network restrictions. |
| Model is missing from the home screen after saving | Restart WorkBuddy, then return to the model list and select the custom model you just added. |
gpt-image-2 Image Generation Setup Guide
Learn how to use gpt-image-2 with Cherry Studio, Skills, and scripts.
OpenCode Setup: API Key, Base URL and Model Config
Set up OpenCode in the terminal or desktop app: install it, enter your API key and Base URL, configure a model ID, and check common connection errors.